


Hi Everyone! I am so excited and entirely honored to be a new contributor on Brooklyn Limestone—and I am especially excited to share with you all of the DIY projects I have in store for 2014.

I think if I had to sum up my personal style it would have to be upcycled industrial. While I do have a few upcycle projects lined up, I wanted to kick everything off with something shiny and new—something completely from scratch. I take a lot of inspiration from Pottery Barn and I really fell in love with this set of carved wood hands. I really wanted a pair of my own! I was reminded of a crazy sculpture teacher I’d had, who insisted on teaching wax mould casting. It was one of those things you were so sure would never come in handy someday, and yet here I was. That’s when it clicked and the wheels set into motion—24 hours or so later I was left with these…

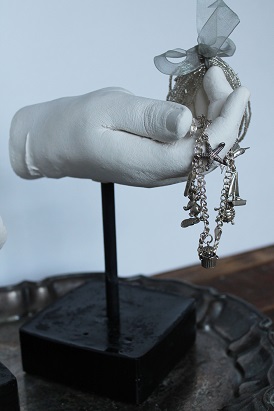
I was originally going to use them for displaying jewelry but I think I really like the simplicity of them on their own. The whole project cost around $20 dollars—how cool is that? This project is technically two separate projects but they only take about 30 minutes each to complete.
Making a Wax Mould
Materials: 3 – 1 lb packs of paraffin wax (found with canning items or on your baking isle), Paraffin Wax Melter (I picked mine up at Goodwill for $4.00 but a pot works too), Bucket of Ice water, 1-2 tsp olive oil
Prepping the Wax: If you have the wax melter follow the directions. If you are using a pot make sure the pot you select is large enough to fit your hand and deep enough to cast up to your wrist without spilling over. Wax should be heated slowly and removed from the burner when it melts completely. It is safe to cast your hand at 120-130 degrees.


- Start by putting your bare hand in the ice bath for 10 seconds. Quickly towel dry and rub a small amount of oil over your hand a little past the wrist. Put your hand in the position you would like to cast and dip your entire hand once up to the wrist. In 5-10 second intervals repeat this 5 times
- You can harden the wax by placing it in the ice water for a few seconds being careful not to allow any water inside the mould. Continue adding layers of wax until you feel it is strong enough to contain plaster without breaking. Aim for ¼” to 1/8” thickness.
- Completely submerge your hand in the ice water, you should feel the mould loosening around your hand allowing you to gently slip out. Allow the mould to sit in the ice water for 5 minutes to completely harden before moving onto the next step. (Make two wax moulds)

Casting your Hand
Materials: Plaster of Paris, ¼” wooden dowel (cut down to the heights you desire your stands to be at), 2 milk cartons (these will be the base), Blow dryer, Sand paper, Black paint, Paint brush, Exacto knife, Industrial Strength Glue (I used E6000
- Each hand takes about 2 cups of dry plaster mix so following the directions on your plaster box mix accordingly. Place your wax hands in a container that holds them vertical and pour into your mould. Allow 10-15 minutes to set before inserting your dowel.
- Each base takes 2 cups of dry plaster mix. When casting your base, allow to set 10-15 minutes before inserting a piece of dowel and removing. Be careful not to make it too large.
- Allow 24 hours to set.
- Using a blow dryer warm up the wax mould until it is pliable and begin removing from your plaster cast. For hard to reach spaces an exacto knife can be used.
- Touch up any rough areas with sand paper prior to painting.
- If you are using an acrylic make sure to properly seal it, spray paint can be used as well creating a more permanent seal.
- Place a dab of glue on each end of the dowel before piecing together and you should end up with something like this...


This is the coolest DIY I have seen in a really REALLY long time. I'd love to do with with my grandparent's hands!
ReplyDeleteThat's a wonderful idea-- I've seen wax casts where they are holding hands that came out awesome.
DeleteGenius! Really! Wow!
ReplyDeleteI totally love this project!!
ReplyDeleteOh....this blew me away! I'm going to try one of my hubby (48 yrs) and mine. Would leaving rings on cause a problem getting the molds off?
ReplyDeleteHmm... I think if they are just bands you should be okay, I would make sure to coat them in oil really well before casting. It never hurts to try, if it doesn't work out you just re-melt the wax cast and start over. :)
DeleteLeaving the bands on should be fine, but avoid the diamonds. The stones may loosen.
DeleteUmmm I need to make some of these for Halloween ASAP!
ReplyDeleteSo cool. I've done something similar but with that jelly setting stuff & plaster (commonly sold in kits to cast your baby's feet/hands). I just bought the supplies separately online & made casts of my hands, for wacky objects. I left on my ring, and the details really show nicely.
ReplyDeletethese are amazing!!!!!
ReplyDeleteA few ladies in my area make these hand casts for moms who have had stillborns/ late term losses. Interesting seeing how its done- thanks for the tutorial!
ReplyDeleteI've never heard of that before-- that's a really admirable cause.
DeleteMIND = BLOWN. Radness!!!!
ReplyDeleteI love this, thanks for the instructions.. it is so cool. xo Nancy
ReplyDelete