


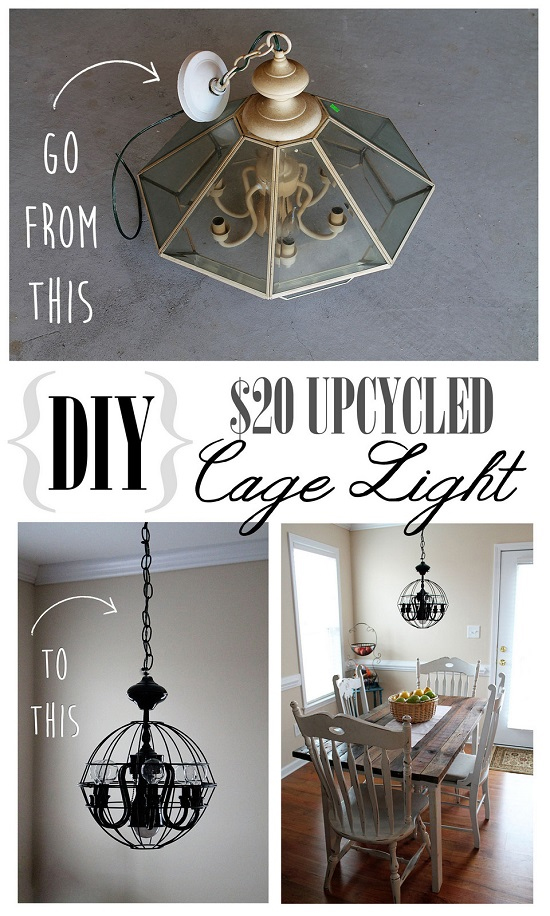
If you’ve noticed all of the amazing globe/pendant lights being featured in design magazines you’re not the only one. Since moving to our new home I have been dreaming day and night of replacing all of the builder’s grade lighting—the only problem is I definitely don’t have $100+ lighting budget for each room. So figured I would try my hand at making my own version for a whole lot cheaper.
Here’s the materials breakdown for making one of these cuties for yourself…
{ Materials }
-Thrifted Light …… $5.00
- 2x Hanging Baskets …… $2.95 each
- Black Chain ……. $4.95
- Rust-oleum Paint …… $4.95
_________________________
Total Cost $20.80!
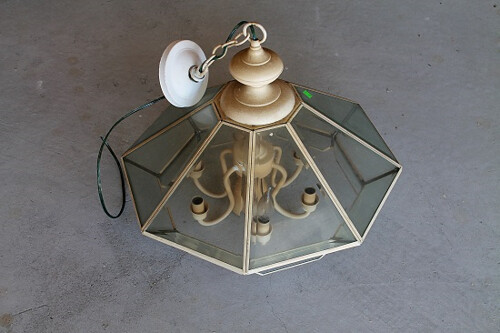
After rummaging through the lighting section at my local Habitat ReStore I noticed they had an abundance of these 90’s glass dome chandeliers. When you are looking for a light to upcycle, make sure it’s not soldered or welded together. I chose this type of light because it was a screwed together assembly (and it was only $5 bucks!)
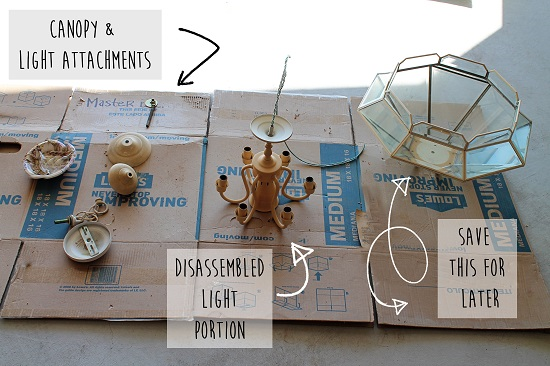
It only took me around 10 minutes to get the whole thing disassembled into all of its various pieces.
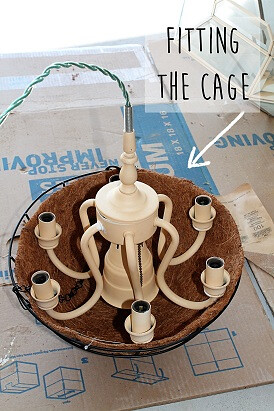

For the globe/cage that goes around I picked up two common garden hanging baskets. I didn’t want anything too big so I went with the medium sized baskets and they fit pretty perfect. I decided to go with a Hammered Black finish by Rust-oleum. Make sure you put little pieces of painters tape over the sockets prior to painting.
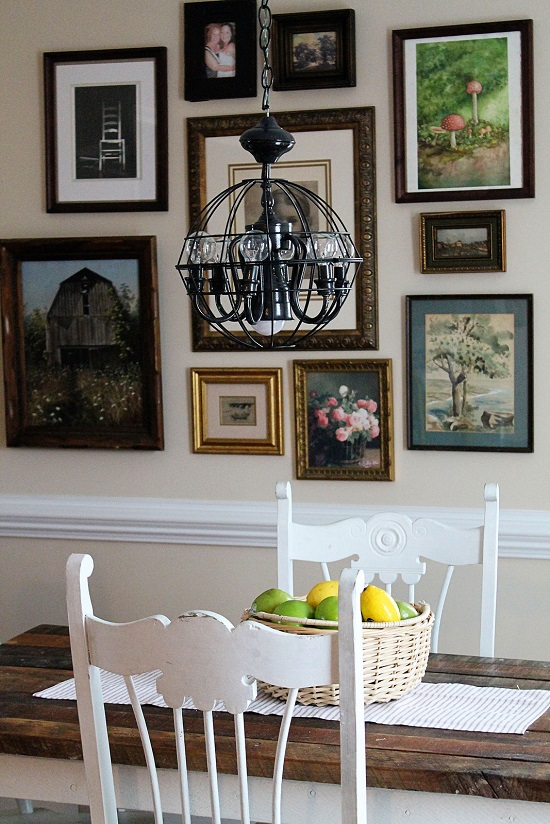
To fit the cage permanently around the light fixture once it was dry I used black zip ties and then wrapped wire over them to cover them up. Black chain was used to hang the piece from the ceiling and before I knew it, there was a glowing pendant hanging in my dining room.


{ If your wondering what to do with that over-sized glass piece I had you save-- you can see what I did with mine later this week. }

This is amazing! I love this project! I will definitely be keeping my eye out for some ugly 90's lighting :)
ReplyDeleteI'll be honest, I like both... the before & after of that lamp! :)
ReplyDeleteHow creative! Looks great!
ReplyDeleteSo cool!
ReplyDeleteGotta love an inexpensive upcycle!
ReplyDeleteWow. You've done it AGAIN! Love the idea of the wire hanging baskets to create a "globe." The final product is perfect for your space/use.
ReplyDeleteSo good Victoria! I am definitely making one of these! And that left over glass cage thing looks like a terrarium in the making.
ReplyDeleteThis is awesome! I love the industrial look. I never would've thought to put these items together. GREAT upcycle idea.
ReplyDeleteThis comment has been removed by the author.
ReplyDelete