Showing posts with label projects. Show all posts

Breaking down the bedroom projects

In spite of some serious efforts this weekend, I'm not quite finished with the bedroom. I need to make a few more tweaks but I'm feeling good about it. (I even broke my personal rule of photographing rooms only during daylight hours to show you...but its not the most accurate portrayal of the color. Ill have some better photos for you next week.)

If you remember last week's post, I put together my ideas. I decided to add yellows and grays to the existing color scheme and now that I see in the flesh, I love it. No surprise that I like the grays, creams and blues (since that is everywhere else in my house) but the pop of yellow adds just what I wanted in here. I know this color scheme may not be for everyone but its exactly what I imagined so Im really happy with it.
MasterBedroomInProgress9
But lets talk about some of the details. First off for the walls. I randomly found this fabulous vintage photo on flickr and wanted to use it somehow. So I got out some paintbrushes and did my best in recreating it in acrylics with a twist on the colors.
MasterBedroomInProgress2
Hardly a masterpiece, I think its a fun way to subtlely personalize the space with something I did by hand. I'm not convinced its location over the bed is the right place. I might switch this around a bit but I'll have to play musical walls this weekend.

Using some of this lovely fabric from Amy Butler, I pulled out the sewing machine to make two pillow cases. Thanks to the those who answered my calls for help on twitter! It really was a simple project - too me about an hour (excluding the time to wash and dry the fabric first)
MakingPillowCases2

After a lot of searching, I finally found a dresser I loved. (This was one of the two items I mentioned purchasing at FIND.) I needed something to sit in the space left of the fireplace tohold the cable box so a little bit of additional storage was welcomed as well. I searched forever for a second hand or budget piece of furniture but never found something that didn't have a major issue. Once I spotted this commode, I fell in love. The curvy shape and the slightly distressed finish was exactly what I wanted.
MasterBedroomInProgress4
After I got it home, I realized just how substantial it was. Its made of a very heavy hardwood and its finish is well applied. So it made me feel better for splurging on it.

So I'm just about there. Its not perfect but its getting close to something I'm happy with. More to come before I call it done. Ill share more details then.

Update on the Box Room (The Found Door Part 3)

So last I updated, the door come desk was stripped and sanded. I had decided not to paint it because I was digging the worn feel and texture of the wood. So I put it to you to ask if I should jazz it up a bit more.
DoorStillNeedsSanding3
Reading your comments convinced me that it was just fine as is. (I admit to being very tempted to try the pickling wax that was suggested by Heather of Doodlebuds but having never tried it before, I got cold feet.) No point in putting more time and energy into something if it wasn't going to improve it. So thanks for your feedback - you saved me a lot of time!

Mr. L and I carried it upstairs to the box room. On a tangential note, I think its time to rename this room since calling it the box room is a bit defeatist, don't you think? Let me know if you have a snazzier title. Anywho, the door made its way to the top floor.


I put together these Ikea sawhorse legs ($20 for a pair) as the base. It only took me about 30 minutes to put them both together. A first, as I usually have to block a weekend for Ikea assembly.


And of course I needed a chair so threw this ($23!) in my cart. I would have much prefered a fabulous vintage drafting stool but I refuse to spend a fortune on one (and everytime I find one, its insanely expensive!)

So here is what the room looks like now:
BoxRoom
Excuse the terrible photo. I decided to photograph at the wrong time of day.

The desk is huge for the tiny room but its a practical choice. I definitely need to make some kind of skirt to hide all of the crafty/sewing things Im hiding underneath so thats on the agenda. And a window treatment. And more bulbs for the fixture. And a glass top for the table.

But what else should I add to finish the space? I think it needs something large on the walls and I have a few ideas but I'd love to hear what you think. What else should I put in here? As you can tell, there isn't much room but I still want it to look pretty.

The Found Door, part 2

Updating you on the progress of the door that will be a desk: I'm a bit stuck.

To refresh, a little before and after of the paint stripping.
FoundDoor1DoorStillNeedsSanding2

After the second coat of Peel Away and a couple more hours of scraping, Ive gotten 99% of the paint off. Hooray! It still needs to be sanded and cleaned up a bit but I think its mostly there.
DoorStillNeedsSanding3

I've officially abandoned the idea of repainting it. The weathered look is working for me. Ideally, I'd like to get it looking a bit like the finish you see on this gorgeous dresser from Anthropologie or this fab dining table from Restoration Hardware. I know it won't quite be like that (different wood, limited skills on my part, etc.) but at least you know whats in my head in terms of inspiration.
So now that I've done the dirty work, there is a part of me feels like something is missing. Those recessed panels are just calling out for some kind of embellishment or display. But what?
On the other hand, maybe its better to just leave well enough alone and let it stand for itself.

What do you think?

The Found Door, part 1

One morning, Mr. Limestone spotted this discarded door sitting on the curb waiting for the garbage man. I'm not sure which neighbor decided to trash it but their loss is our gain. We carried it in the house, leaned it against the hallway wall and waited for inspiration.
FoundDoor1
I batted around a few ideas until I came to the conclusion that turning it into a work table would be a good second life for this. Its long and lean and would make a lovely space to roll out fabric, make invitations or any number of crafty endeavors. And since I have a perfectly unused box room, I had just the place for it.
FoundDoor2
It was dirty and lumpy with paint drips so while I could have just slapped a new coat of paint over it, I decided it needed to be stripped down before anything other decisions were made about it.

Enter Peel Away. If you've been a really long time reader of this blog, you'll remember my experience with striping. So I went back to this goopy green magic potion to get rid of the paint.
FoundDoor5

First I removed the hardware.
FoundDoor3

Then loaded the door up with the stuff - think frosting a cake.
FoundDoor4

Covered with parchment paper (Peel Away sells their own papers but I find wax paper to be a lot cheaper and work just as well.) and let sit for 24 hours.
FoundDoor6

The next morning I went out there with scraper in hand. The term "Peel Away" is a little misleading. Sure, some of it peels. But most of it has to be forcefully evicted with a sharp edge.
FoundDoor7

Scrape. Scrape. Scrape.
FoundDoor8
Scrape. Scrape. Scrape.
FoundDoor9
Scrape. Scrape. Scrape.
FoundDoor 10

Two hours and two blisters later, this is the result. Close but no cigar.
FoundDoor 12

I had hoped to finish the stripping this weekend but the upcyling gods did not smile upon me. Another coat is working its magic now. I'll have to clean it off in the dark tonight.
FoundDoor 13
(Ran out of wax paper, turned to cling wrap to finish the job.)

Wish me luck.

UpCycling

Despite what my recent posts might suggest, I am still very much interested in home stuff. Just have a few more self-imposed distractions lately :)

This weekend will be the first in a while that I have some free time. To-do list, I'm looking at you! Will I be practical and get to those unexciting maintanenace projects like touching up scuffed paint or organizing my pantry? NAH! I'd much rather work on something with a more satisfying result. With that in mind, I have a project in my head to reuse an old door we found on the curb a few months ago. It may or not pan out but I'll let you know how it goes.

But with that project at the forefront of my thoughts, I'd thought I'd put the question out to you:
Do you upcycle?
In other words, tweaking something to make it more useful / practical / beautiful / valuable.

You already know Im a fan of reusing something lovely into something practical. Case in point, Big Cat's bed from a old suitcase and art from an old dictionary.
Cat Bed Step O Finished2
WebstersNewWorldDictionaryTornPageWebstersNewWorldDictionaryFraming3

But I am much more enamored with some of the clever projects and products out there. Some of my favorites...


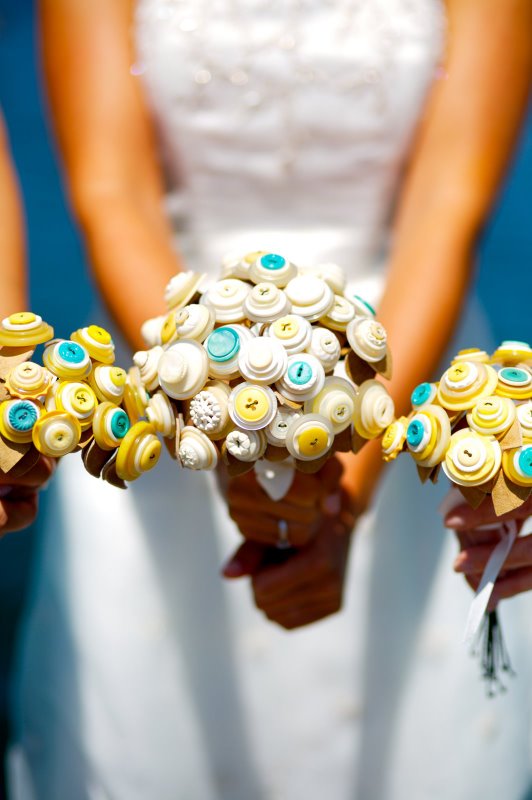
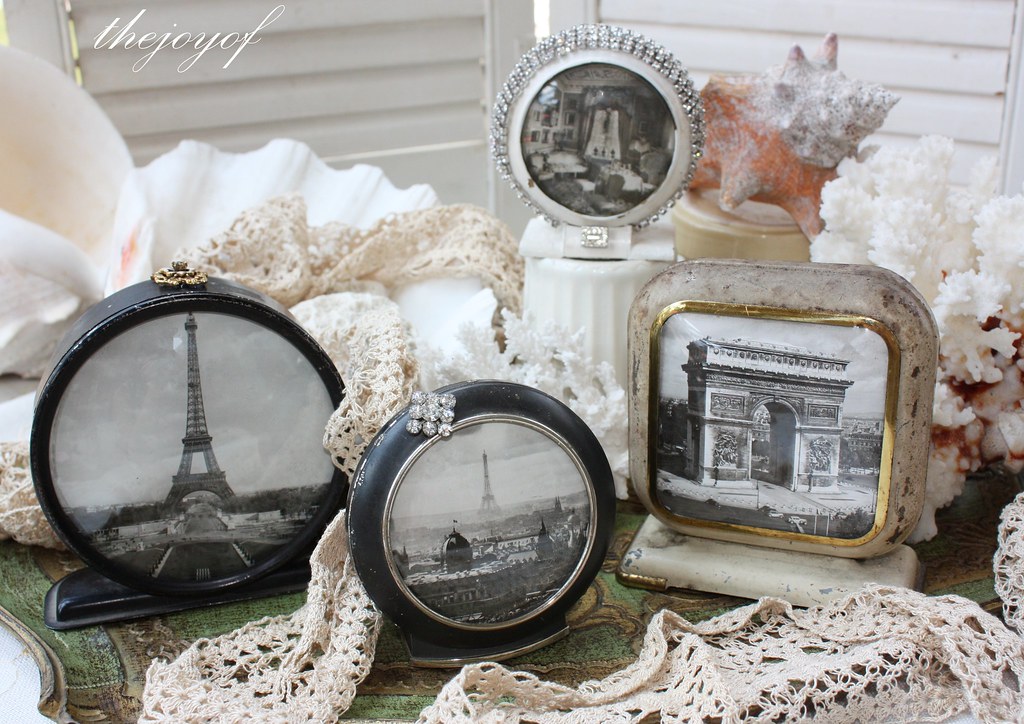
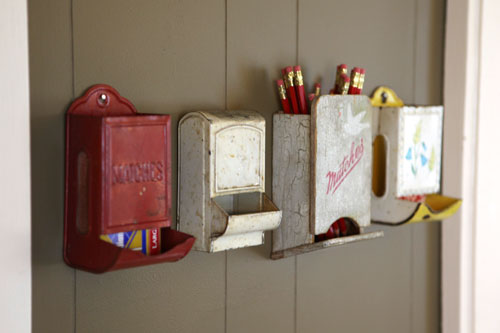
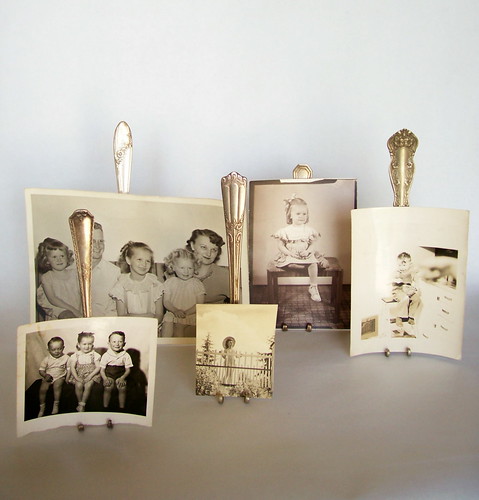
Teacup pendant lights from Domestic Contruction, Button Bouquets from Lil Fish Studio, Vintage clocks turned frames from The Hope Jar, Repurposed door from Fixing it Fancy, Matchholder Office Organizers from Ali Edwards, Fork Easels from Whimsy Love, and Suitcase turned filing cabinets from A Poetic Home.

So what about you - do you have any upcycled projects to share? Add it here - I'd love to get some inspiration for the weekend.


Chic on the Cheap: Pet Bed Step by Step

Maybe it was all the adorable puppies on other peoples blogs? Maybe I just didn't want to tackle a drugery project like closet cleaning? Whatever it was, I spent the better part of Sunday on a pet bed for Brooklyn Limestone's very own mascot, Big Cat.

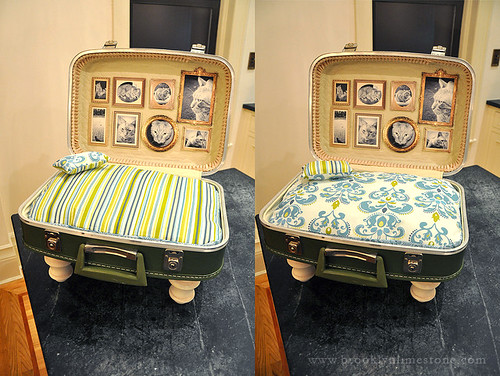
I started off with this vintage suitcase I bought for $3.
Cat Bed Step A

Our cat seems to just love to sleep in our suitcases, so I figured it would make a perfect place to sleep. Since Big Cat has discriminating tastes, some upgrades were in order. First off, he needed a cushion.

Cat Bed Step C

I used some fabric pieces I bought at Micheals. I just happened to be shopping there for another project so these jumped right out of me. For a more wallet friendly alternative, use leftover fabric or old clothing.

Cat Bed Step B

I cut a template of the interior shape and size out of newspaper.

Cat Bed Step D
Cut to size. Washed, dried and ironed.

Cat Bed Step E
I didn't have a pattern but using my experience making a box pin cushion, I winged it. Its essentially the same concept but larger.

Cat Bed Step F
Sew. Sew. Sew. (Don't forget pin, iron, futz with machine, iron, pin, etc..)

Cat Bed Step G
I made the pillow using three different fabrics but you could easily make it out of one or two.

Cat Bed Step H
Thats right, its reversible!! For a cat of many moods.

Cat Bed Step K
I handed the empty pillow to Mr. L to stuff and fluff while I worked on other embelishments.

I've often mentioned how I love photo gallery walls but I don't have the cajones to make so many holes in my plaster. So who better to give one to than our feline friend?

Cat Bed Step L

If you are pressed for time, try to resist the urge from spending way too much time pouring over cat photos and retelling cat history with your husband.

Cat Bed Step Lc

I clearly violated this tip. Do you see its dark out in the next photo?

Cat Bed Step M

Here is where I really blew the budget by committing a mortal sin of cheap chic projects. I paid retail for 4 squat wooden legs at Home Depot. At nearly $6 each, they were a splurge. Rest assured, you can find these for much less by scavenging furniture or improvising with other bits that work just as well.

Cat Bed Step N

I glued my legs to the bottom with gorilla glue because thats what I had on hand.

Finally, it was time for the unveiling.

catbedreversiblepillow_www.brooklynlimestone.com

Yea, thats right. You see a tiny reversible pillow there. I had the fabric and the machine was already warm - who can you blame me?

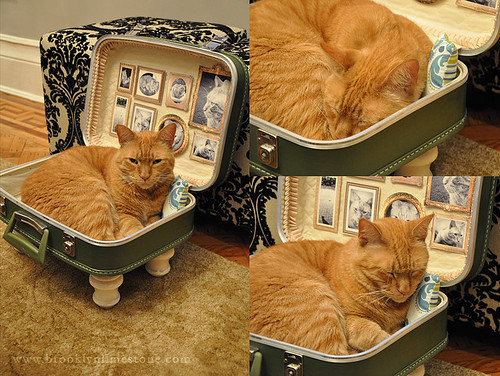
I was so pleased with how it turned out. If I could fit, I would have curled in there myself. Down it went on the living floor for his majesty's inspection. Turns out, Mr. Cat wasn't so happy with my upgrades. Do you see what is missing?

catbedsuitcase_www.brooklynlimestone.com
Thats right - the cushy pillow I spent most of my time on!

Surely if that suitcase would have been fitted with a black sweater that he wasn't supposed to lay on, he would be rolling around on it happily. All I can do is shake my fist as the pet gods and confirm that we have the world's most ingrateful cat. At least he liked the itty bitty pillow I made.

In the expectation you have more appreciative characters in your house, hope you found this tutorial helpful.

Passport Art on the Cheap

As you know, I have travel on the brain. So I got to thinking how I incorporate some momento of our trips into our home. We're notoriously bad souvenir shoppers so it couldn't be tchotckes. After revisiting this project (from the now defunct but sorely missed Blueprint magazine) sparked an idea.

This is a re-interpretation of that concept but on a much smaller (and more diy friendly) scale using the "art" found inside the pages of a passport. But if travel isn't your bag, you could easily apply the same concept to lots of other scannable pieces like children's artwork, photographs, concert tickets, vintage receipts, cool advertisements, etc..

First off, I purchased some 6x6 wooden panels from an art supply store. These were onsale for a less than $5 each.
PassportArt1
Opened my quart of trusty gold paint and applied to the sides...PassportArt3
Allowed to dry...
PassportArt2
Trolling our passports for worthy stamps, I realized that I didn't have one from Paris!! So not happy about this. I'm told that if I ask for one, I might get lucky so perhaps this is a good excuse for another trip? Either way, I was bummed I couldn't include it in this project.
Moving on, I had just 8 stamps that fit the following requirements: Worthy location, a good trip we took together, semi-legible and attractive. Those got scanned...
PassportArt5
Enlarged the images to suit the size of the panels.
PassportArt6
Cut the prints down to a size slightly larger than needed.
PassportArt7
Coated the reverse side of the paper with spray adhesive.
PassportArt8
Laid the paper on top of the wood and pressed down all over. Let dry.
PassportArt9
Flip the whole thing over. Using the edge of the panel as a guide, cut to size.
PassportArta3
Repeat until you've done the whole lot.
PassportArta4
I added a light spray of clear top coat over all of them. Not sure if that was really necessary but since I had it already, no harm in adding it. The last step was to hang. Spacing them just so took longer than making them!
PassportArta6
If I exclude the materials I had on hand like the paper, and glue, etc - this project costs about $5 each.
PassportArta7
I also like how these pieces are personalized but it doesn't hit you over the head with it either. I know they are my stamps but no one else would know unless they asked.
The only problem is that I need a lot more to get the full effect - I'll just have to work on amassing some more worthy stamps. Oh, the burden I carry.

Follow @ Instagram

© 2007-2020 Brooklyn Limestone. All Rights Reserved. Privacy Policy
Back to Top