Showing posts with label projects. Show all posts

Rainbow Stripe Desk Makeover

If you are following me on Insta, you might remember this little french provincial style desk we picked up for $20 bucks at a flea market. Aggie actually chose it so it was an easy sale. I shared a photo of her standing next to it proudly and soooo many people messaged me to say they had this same desk growing up in their bedroom. Not surprising since it was a big seller for years from Sears. It originally sold for $79!

Obviously I couldn't leave it as it was.


A couple of coats of chalk paint, a little refresh of the hardware and some rainbow stripes  for the top.  This was exactly the kind of makeover this piece needed to give it a updated look but didn't require much effort.  Aggie loves her new desk and it adds some great storage for all that paper that 6 year olds seem to create in their wake.


DIY Tiki Bar

Build a basic tiki bar for your next backyard luau with these easy to follow instructions.


Somehow Oscar is turning one next week and we wanted to make sure to mark the occasion in a way that would fun for the adults and the kids. A backyard luau is something we have never done before so we went with it.  In addition to the grass skirts and flower leis, I wanted to build a basic tiki bar to add to the charm. I made this one small enough for our back deck but you could adjust to any size.


I wanted to make something quick (I made this during baby naps over 1 24 hour period), easy (no special tools required) and reasonably cheap.   This was my solution and I think it looks appropriately Gilligan's Island. I also plan on reusing it for this year's Halloween display so doubly useful for me.  If you wanted to create something that would withstand the elements for longer and/or looked less rustic, you could use cedar which withstands moisture and rot but I just used the cheapest lumber I could find.

Materials used: 13 1x4 cut into 35 inch lengths, 2 1x2 cut into 29 inch lengths, 6 1x2s cut into 13 inch lengths, 1 16x36 inch wood piece for the top, 2 29.5x13 wood pieces for the shelves, wood screws, stain or paint

Build the Tiki Bar

  • Line up 9 of the 35 inch pieces edge to edge. Screw together using 1x2s.  Place those pieces where you want your shelves to sit. I have them at 13 and 21 inches from the bottom. This will make the front of the tiki bar.
  • Line up 4 of the 35 inch pieces edge to edge, screw together using 1x2.  Repeat.  This will make the left and right side of the tiki bar.
  • Screw the left and right sides to the face by abutting the short edge to the back of the long edge.
  • Screw in the 1x2s to the underside of the top.  Screw in at right and left for extra hold.
  • Place the shelves on the 1x2s support
  • Stain or paint as desired. I used a mix of brown paint and MinWax Coastal Grey stain.
  • Optional: use scrap wood to create Tiki Bar sign hanging from the counter

The only tools you need are something to cut the wood with (or get your local hardware store to do it for you) and a drill.  It came together pretty easily and has a lot of rustic charm perfect for a luau display.


DIY NETFLIX + CHILL BATH CADDY

DIY the bath caddy of your dreams using a piece of scrapwood using this easy tutorial. 


I know all you hopeless romantics out there are looking for the perfect handmade Valentine for your schmoopy.  Well move along!  This DIY homemade gift (which is perfectly acceptable to make for yourself!) is for all the lovebirds who just want a few minutes alone in the bathtub with their favorite tv show and beverage.  Is there a bah humbug for Valentine's Day?  This bath caddy is the embodiment of it.  This is 'Netflix & Chill' for grown-ups. Can I get an "Amen"?

This project is super simple and if you happen to have a router (or can borrow one for a few minutes) you are set.  Simply cut a board to the width of your tub, mark out the appropriate size divots for your smart device, votive candles and wine glass of choice.  The first step was to use a corner round bit to finish up the rough edge of the board. I used a straight bit to cut out the slot for the iphone, votives and wine glass. Voila!  I think it would look even better stained but I was too impatient so I took the easy route and got the bubbles going.


Happy Valentines Day lovers and loners alike!


Instant Indoor Hanging Garden Hack

I'm all for an elaborate DIY that takes all  day but sometimes you just want the easy way out. Well here it is people.  An indoor garden that does the trick and can easily be completed in less time than it takes to make a cup of coffee.  For real!


My supermarket had these little herb plants on sale for $2 each and I happened to have both the pots and the tension rod hanging around so I put this up and I was done.  (If you want to make your own version, you will need a tension rod and these Ikea utensil holders.)  I just need to pick up one more pot to hang my rosemary and I'll feel like Ina Garten!

When these herbs die (which they surely will as I kill most plants), I'll head out to my slightly more elaborate DIY outdoor hanging planter  and bring in a few succulents.  For Christmas I might replace them with those tiny little evergreens that look adorable with tiny lights.  The options are endless!


Should you be in the mood for something more elaborate, I DIY'd this gift wrap organizer with lots of Ikea doodads a while back.


Country Cottage: Simple Rustic Dining Room

You've already seen the country cottage living room makeover (which definitely qualifies as one of my favorite rooms evah!) so it's time to see the other side of this room which is the dining space. With budget a serious constraint, the decision was the keep this room simple and more cabin like. That way it served as a counterpoint to the living room as well as a calm, open entryway to the whole house.


Renovation was essentially a clean up job. Pulling up carpet, sanding and staining the rustic existing floor boards and the whole space getting a fresh coat of white paint. The dining table and chairs are hand me downs from my sister in law's parents so absolutely free. The indoor herb garden was put together with a few scraps and some hardware and make a great live addition to the room.  The one splurge was this antler chandelier which gives the whole space a fun element while still being clean and modern.


When budget allows, I think these copper chairs along with some drapery and a sisal rug will finish off this room beautifully. I'm trying to convince them a shiplap wall would be pretty rad too but it's a bit of splurge and I think they are all DIY'd out lately.  But plenty of time to work on that in future years - until then, this is a lovely spot to entertain (and my sister in law is an amaaaazing cook and baker so I always look forward to meals here)


DIY Wooden Doormat: Please Remove Your Shoes


Right along with the spring flowers, I'm shaking off the cold and jumping into some spring spruce up projects. The first is a virtual DIY project party with some of my favorite bloggers. Each of us was asked by The Home Depot to put our own spin on this DIY Wooden Doormat.


I don't know about you but I find it much easier to keep the house clean when we leave our shoes at the door so that's a general rule in our house.  This little enhancement to that project makes it easy to share the message without keeping watch at the door.  And on the occasions we bend the rules, its easy enough to flip the mat over to the plain wood side.


Starting with 2x2 lumber, I cut, stained and drilled so that the pieces could be strung with sisal rope. I modified the original instructions to simple tie the rope once rather than knot it between each piece of wood.  This made seeing the design easier as well as made the entire mat small enough for me to use indoors.  As you can see you can add or subtract wood pieces easily enough to customize it to a size that works for you.


Once the stain was dry, I strung the wood pieces with the rope and taped down my printed design.  Using lots of pressure and a ballpoint pen, I traced the design so the impression would be left on the underlying wood.  Then I peeled back the design and went over those impressions in the wood with a white ink pen.  Finally using that light white outline, I went back in with a white sharpie marker and finished the design.   The white marker is permanent and will only add to the charm as it wears on the wood.


Now off to see what some of the other bloggers have dreamed up for this project.


DIY 3 Bin Stand

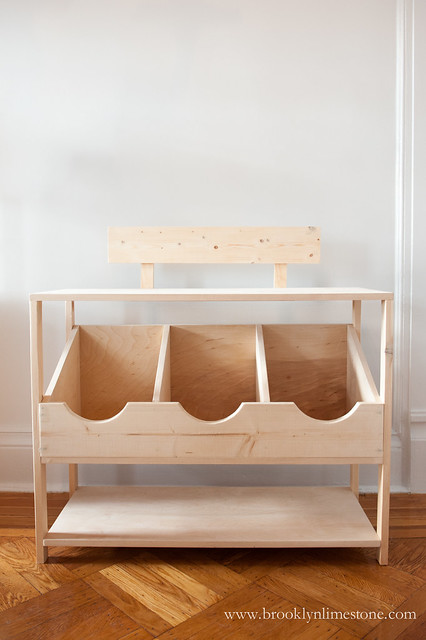
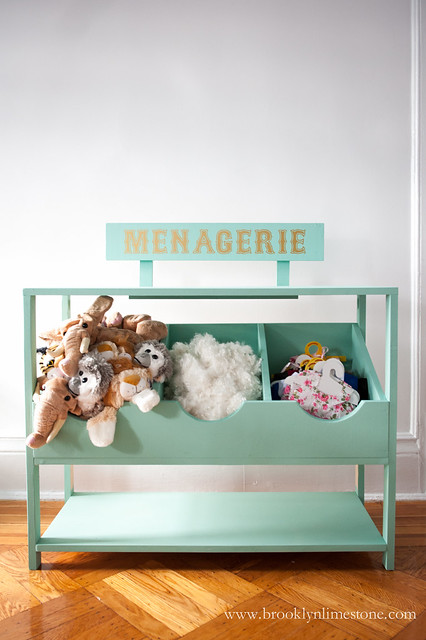
You've seen the patisserie and the dress up boutique.  Closing out the series is simple but functional 3 bin storage unit that That's My Letter built to house the make your own stuffed animal activity.   This piece worked perfectly for its purpose but will make a great piece of toy storage going forward.  Want to build your own?  Pop over to That's My Letter for free plans and details.


PretendPlayParisStands_BrooklynLimestone (3 of 7)PretendPlayParisStands_BrooklynLimestone (7 of 7)

That's a wrap for the DIY party stands.  I hope you've enjoyed seeing more of the details that went into each. I'll be eternally grateful to Jaime for sharing her talents with me and making this party such a success.


DIY Pretend Play Dress Up Boutique

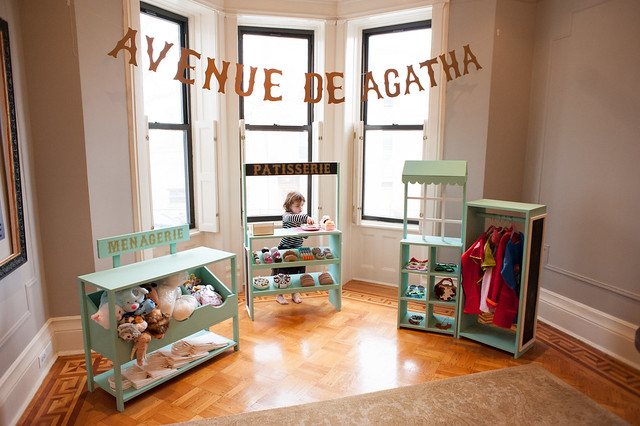
The star of Aggie's Paris Pretend Play birthday party were 3 pretend play stands that I worked with the amazing Jaime of That's My Letter to create.  Unlike the patisserie stand which was rather simple, the Dress Up Boutique was taken to a whole new level by Jaime's design.  Not only did it house and display dress up costumes and accessories but it had lots of charm with a scalloped awning and mullioned window.  I just loved it!

The cubbies displayed kid sized sunglasses, costume jewelry and other accessories that couldn't be hung while the rack had several of Aggie's favorite dress up costumes and capes for all the kids to enjoy.


Want to build your own?  That's My Letter has generously shared the plans to recreate one for your own fashionista!

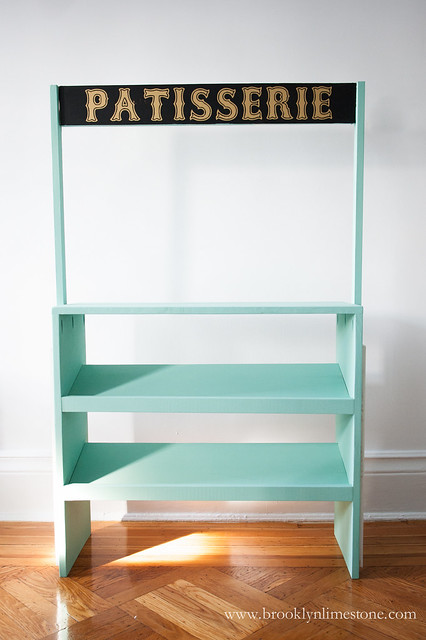
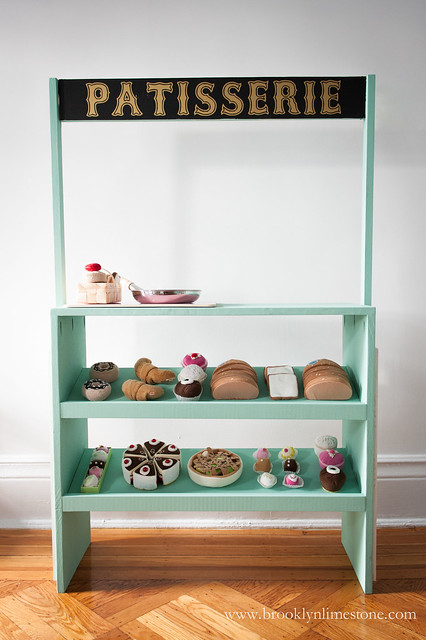
DIY Play Patisserie Stand

After sharing some photos of Aggie's birthday party this week, I wanted to highlight the star of the show - the DIY pretend play stands.
aggies3rdbirthdayPARTY (2 of 71)
The idea for them is what convinced me this party theme would be perfect for the three year old set.  The only problem was just how was I going to get all of this done?  Enter the amazing Jamie of That's My Letter who so kindly offered to help design and build them out of the kindness of her extremely big heart.  And the love doesn't stop there - she is kind enough to share her hard work with everyone who wants to DIY their own little patisserie (or supermarket, pet store, jewelry store, whatever) by sharing the build plans here.

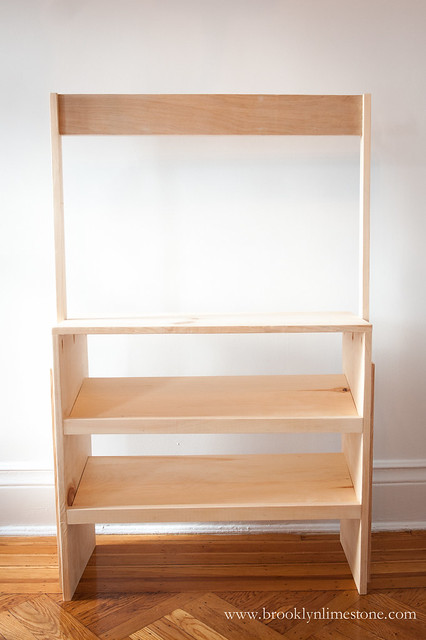
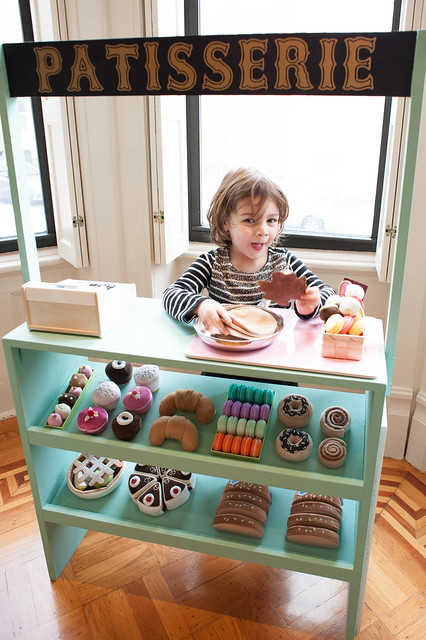
She had no idea just how much I needed the help at that particular time so it was an especially wonderful treat.  Needless to say she did a much better job than I could have ever done in a million years.  Now on to the details.  Today's focus is on the Patisserie stand which was the more simple build but ended up being Aggie's favorite.

PretendPlayParisStands_BrooklynLimestone (1 of 7)PretendPlayParisStands_BrooklynLimestone (4 of 7)
PretendPlayParisStands_BrooklynLimestone (5 of 7)aggies3rdbirthdayPARTY (4 of 71)

After Jaime had done the hard work of building them perfectly I got to work finding the perfect shade of minty green as an homage to ultimate french patisserie, Laduree.  The awning was painted in black and finished with gold letters.

PretendPlayParisStandsB_BrooklynLimestone (2 of 2)

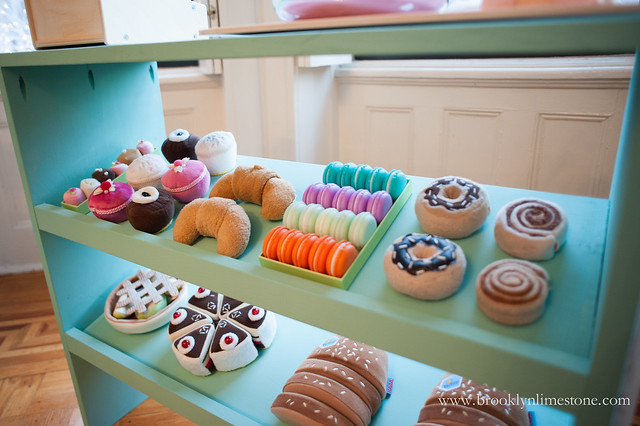
Finally the finishing touches of the pretend sweets brought it home.   Almost everything was from HABA's Biofino line including the Bread Loaf, Crepe Set, Assorted Cookies,  Petit Fours,  Sweet Pastries, Sweet Muffins, and Apple Pie.  To say this whole thing was a hit would be a big understatement.  And even sweeter is ever since the party, Aggie has asked what I'd like from the bakery as she takes a few minutes to make me a little treat everyday.  I'm so happy with how it turned out, I hope you'll be inspired to make your own.

Stay tuned for more details on how the other two play stands came together later this week.


DIY Mountain Lodge Sign

If you have been trolling around the various Christmas decor posts this year, you might have noticed there seems to be an abundance of miniature skis everywhere. That's because Target sold this adorable wooden decorative element for $3 bucks and everyone went nuts (me included!).  As soon as I saw them, I knew just what I wanted to do...


While I don't really do a specific "theme" at Christmas, I seem to be veering toward the cozy, rustic lodge feel this season.  This DIY sign totally embraced that concept and made the perfect accent for my dining room wall.  I was able to use materials I already had (except for the skis of course!) so I was able to complete it in an afternoon. I still have a bit more decorating to do before I can call it ready for the festivities but this sign might be my favorite project this year.


I started by cutting down a piece of picket fencing (the very same I used for my Charlottes Web Halloween decorations). Then, using a pencil I set up the layout, erasing as needed until I was happy with the design.  White and red paint was used to fill in the pencil marks along with a black sharpie for shadow lines.  Finally I erased the pencil lines and hung up the sign.  Voila!


I'll be sharing more of this years Christmas decor next week.  I hope you aren't already sick of holiday posts just yet.  Since I don't decorate until after Thanksgiving I always feel a little bit behind.


DIY Painted Wood Wreath

Who is ready for a little Christmas DIY?  I just love fresh evergreens but sometimes an unexpected touch can really brighten up a space.  This modern take on a christmas wreath is easy to recreate, a great way to reuse scrap wood and easy to store thanks to it's slim profile.


You'll need a piece of plywood as large as you want your wreath as well as a pencil, a drill, a popsicle stick along with whatever colors of paint you prefer.

Start by drawing your wreath and bow (optional). You want to have some variation and imperfection here to mimic nature so the ability to draw properly is not a required skill.  And in case it really goes off the rails, you can always erase and start over.

Once you are happy with your shape, use a jigsaw and drill to cut the wreath out. I can never seem to get perfectly clean cuts (I think I'm using the wrong blade - anyone have tips?) but it doesn't matter because those jagged edges will be smoothed out with a light sanding and then covered up by paint.  Again, perfection need not apply.  When you've finished your cuts, sand down the front and edges to make reasonably smooth.  Wipe away any sawdust from the pieces.

Using a mixture of about 2/3 paint, 1/3 water, cover a small piece of the wreath. Then create the leaf shapes by dragging the edge of a popsicle stick to make marks in the paint. Continue doing this all around until you have covered the wreath.  Allow to dry completely.
To add the red "berries" drop blobs of red paint in clusters of three around the wreath.  While that is drying cover the bow shape in the same red paint and use the same popsicle stick technique to add some simple detail to the bow.  Finally attach the bow to the wreath using wood glue and allow to cure completely overnight.

Voila!  A modern painted wood wreath you can hang just about anywhere that will last a lifetime.

ps: For those of you who asked what I end up doing with my Halloween decorations, this is a good example. This wreath was once the Zuckerman's pig sign.

Follow @ Instagram

© 2007-2020 Brooklyn Limestone. All Rights Reserved. Privacy Policy
Back to Top