


First a little bit of info…
I got married last July 12th… yes; it has almost been a year! It has been the best year of my life because I married the most amazing guy! Anyways, we had planned on moving right into my husband’s house, which is why we had painted the entire house, renovated the bathrooms, and made plans for other overhauls to the kitchen and other areas. Well, long story short my hubs is a realtor and owns this (and other homes) with his friend. Let’s just say a week before the wedding; we realized it would be better to get a place ‘all our own’. So, with the wedding so soon, we decided to look when we got back from our honeymoon for a place we could make “our first home”. We waited and looked and looked and looked… and found an adorable townhouse. We had decided the perk of a townhouse was there was still a pool (we didn’t have to take care of) and a lawn (we didn’t have to take care of)… basically maintenance free for our first couple of years in marriage… please and thank you… more time for us!So… long story short…. We picked up the townhouse and decided we would only live here about two years (we still have another to go)! Since we decided that we didn’t want to be here but for so long, we weren’t going to go crazy with renovations (our place was built in 2006) and painting etc, that way the place would be easier to sell when we are ready to leave!
Our house was bare before we made it a home! Here is a sneak peak at a few of our rooms...
Living Room...

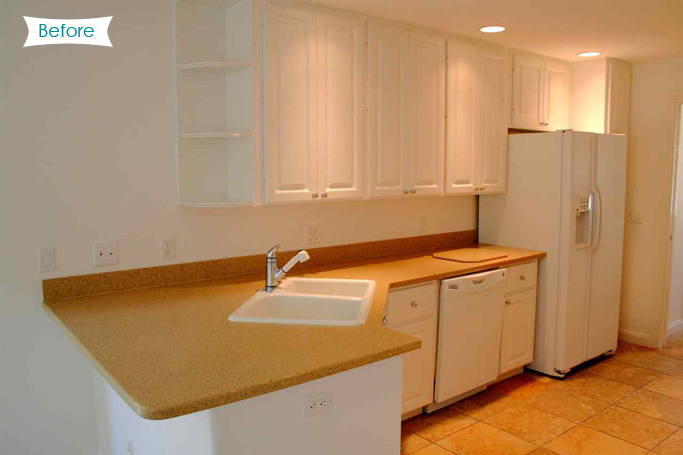
Kitchen...

Laundry Room...

Master Bedroom...

Guest Room...

Ok… so here is how we made “Our First Place” Home…
Living Room... (Now tiled)


Kitchen...

Laundry Room...

Master Bedroom...


Guest Room...


So, here are a few tips on adding color to your space if you are like us and want to keep your walls white so you can sell soon, or even if you rent!
- Area Rugs: An easy way to define a space within a room and add color is an area rug. One large dramatic and colorful area rug is much better than multiple smaller area rugs scattered throughout a room. If you are decorating the living room, for example, select one large area rug to anchor the center of the room and then place the furnishing around this area rug with the coffee table in the center.
- Artwork: Of course you can add color to walls without painting by using wall art which can certainly be purchased or made. Choose bold paint colors that reflect the theme of your room. If you are doing French Country style, you will want to choose golden yellows and lavenders to reflect the French Provence countryside. If you are in the mood for a little DIY Project~ you do not need to paint a picture, unless you want to and are artistic. Simply paint the entire canvas the color of your choice. Then hang 3 large canvases side by side on your biggest wall. This will give the illusion that the room has been painted that color.If you choose to purchase artwork, pick a piece that showcases intense colors but also works well with the existing pieces in your room.
- Curtains: Use colorful curtains at the windows to add color to a room without painting. It will look more dramatic if you use solid color curtains or draperies and not prints. Make all the draperies or curtains the same color and purchase the longest length available. Mount the curtains way above the top of the window, as far up as you can with still having the curtains reach the floor. The curtains should puddle about 4-6 inches on the floor.
-Pillows & Slipcovers: If you have a dark room, and you want to lighten it up for spring, add a few bright-colored throw pillows to accent your furniture. Buy a couch slipcover for every season, and change it out as desired. Try light, airy colors such as light blue, yellow, white, or green for the spring and summer months and deep, rich colors such as purple, gold, red or navy for autumn and winter. You can also try the same with duvet covers for your bedroom.
- Fresh Flowers: Group your favorite spring flowers, or scatter single stems, in bud vases around the room to infuse a little freshness and a dash of color into your space. Just remember to dispose of them when the color fades.
- Lighting: Add color with lighting? Sure! A simple solution would be to incorporate some colorful lamps and pendants. Also, Incandescent lighting can add more warmth, and accent lighting can highlight an area of the room adding some additional cheer.
- Accessories: Incorporate colored accessories within your room. It’s OK to be playful and fun when dispersing your accessories around the room. Also, bookshelves aren’t just for books, incorporate some freestanding bookshelves, and use them to display a colorful collection of pottery, figurines or glassware.
Again, in design, sometimes it can be the small things that make a house feel like a home! We like breezy, comfortable and relaxing spaces that also make our guests feel welcome! I have my fair share of designing high-end homes that have that "magazine ad" look to them, and although I love to be the interior designer on those projects, my home is my refuge and we "live" here. With all the design ideas I have bouncing around my head, when we do buy a single family home this year, I am going to run wild with them! So, stay tuned for that! In the meantime, I am still painting accents, arranging and re-arranging and as Kevin (the hubs) says, accessorizing the accessories!!
I really hope you enjoyed "our first little home makeover"… I hope you’ll come by and visit my blog for more interior design tricks and tips, to see our other rooms, or for your very own design package!
A big thanks goes out to Stefanie – love your blog and your home! Thanks for having me as a guest, it was really fun!

I especially like the master bedroom the blue wall with the white stripeing detail! Very cool. I love the brown with it!
ReplyDeleteCindy
talk about before and after! I can't believe made such a bland white space so fun!
ReplyDeleteI love the transformation! Great Job! I have been able to work on some great high end projects through out my career but I think my favorite projects are the ones that were done on a small budget. It forces you to be more creative than if there was a larger budget. I am firm believer that great design is great design no matter what the budget is.
ReplyDeleteThe master is so cozy. I've been wanting to put a quote over my bed for a while now. I was thinking wall art, but I'm loving that love sign!
ReplyDeleteIt's amazing how some accessories and a little "staging" can really transform a home! You did a great job Lindsay!
ReplyDeleteYou have it dressed to perfection!I love what you have done to your rooms specially the master bedroom!so elegant and so chic!so amazing,Also the guest room very organized and looks so calming!thanks for a wonderful blog you share.
ReplyDelete