Showing posts with label country cottage. Show all posts

Outdoor Movie Night at the Country Cottage

Remember the fab DIY circular patio and firepit I shared last year? Well, it got a serious upgrade in the form of an outdoor movie theater set up this season.


You will have to excuse the less than stellar image. The truth is, we were having too much fun out here and I just never got around to taking a great photograph.  But I think you can get the idea.

It's not something they keep up permanently but rather bring it out when the situation calls for it.  I think Aggie's first viewing of the Wizard of Oz was certainly occasion enough.

For those that are curious about the details, the projector is a refurbished home theater projector.  I was really shocked how clean and crisp the picture was even with the ambient light around the patio in the form of the outdoor string lights.  The only downside to this projector is that the built in speaker isn't great so my brother uses a separate speaker instead which worked perfectly.

As for the screen I had just assumed they would hang a white sheet up between the trees.  Little did I know that a sheet just won't work very well b/c the light goes right through it so they were going to need something a bit more heavy duty. They used this portable projector screen, added heavy duty grommets to the edges and built a frame out of pvc pipe that was easy to put up and break down as needed.

With the fire roaring and everyone kicking back in the adirondack chairs, it's a pretty amazing set up.

Firepit Patio - Country Cottage DIY Circular Outdoor Entertaining Space

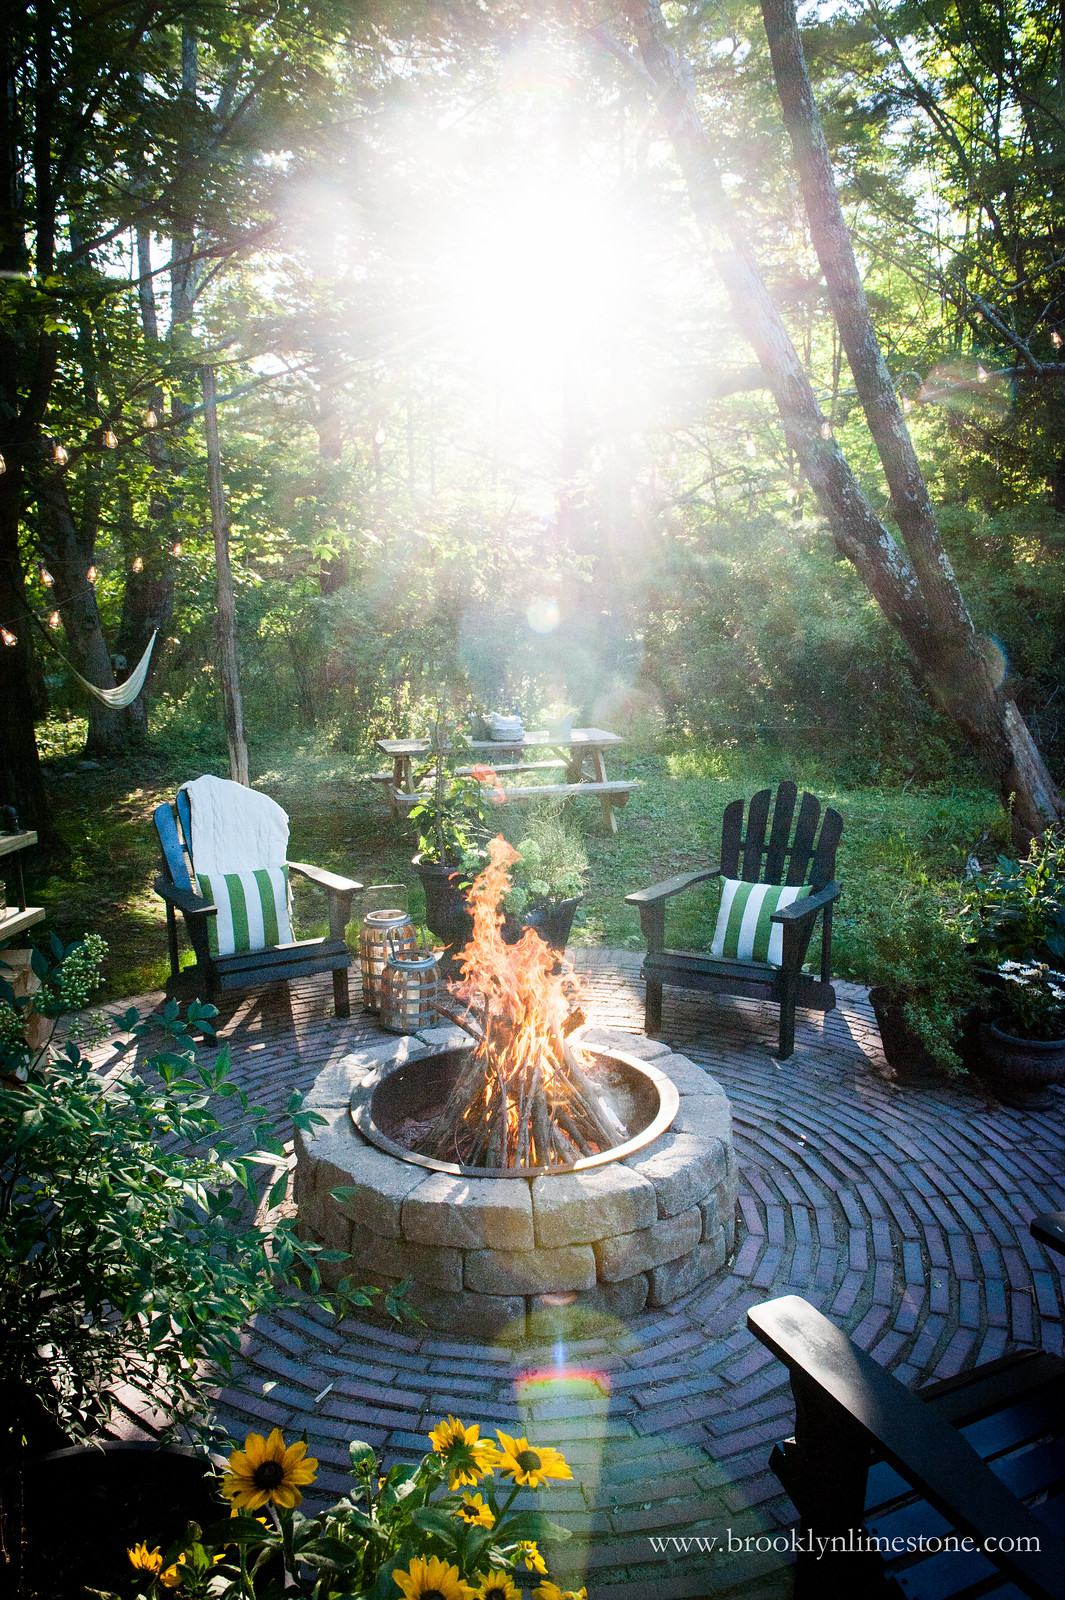
This DIY firepit patio creates the perfect entertaining spot for evening guests. It's circular pattern gives it fun and whimsey.

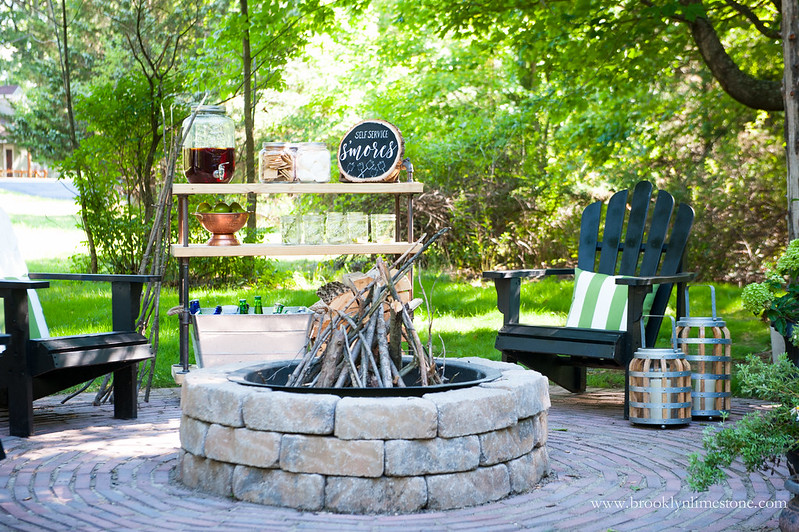
Completed firepit patio with Adirondack chairs lights and plants

Disclosure: This project was done in partnership with Lowes but all opinions expressed are my own. 

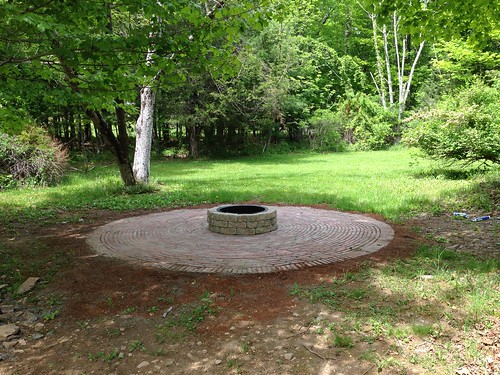
Woo-hoo!  The country cottage's circular firepit patio is finally complete!  It was a bit of a battle as we had some obstacles in the form of bedrock at the patio site and an extra cold spring and rainy weekends but it got completed in July and I'm so happy to share it. Let's start at the beginning.

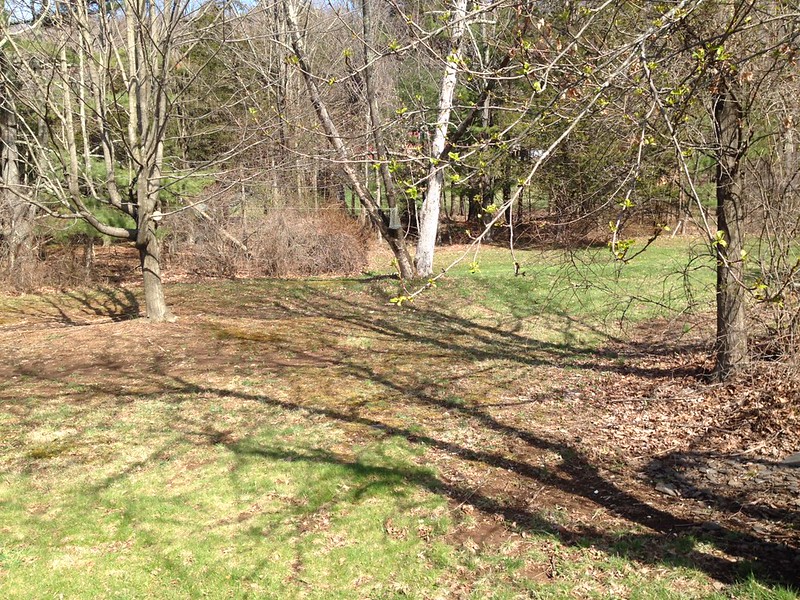
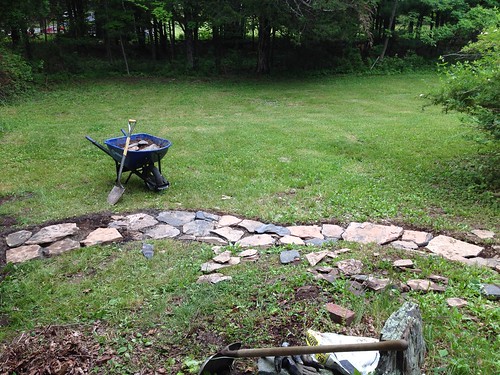
This is the before we installed the Firepit Patio:


  Before photo of firepit patio space

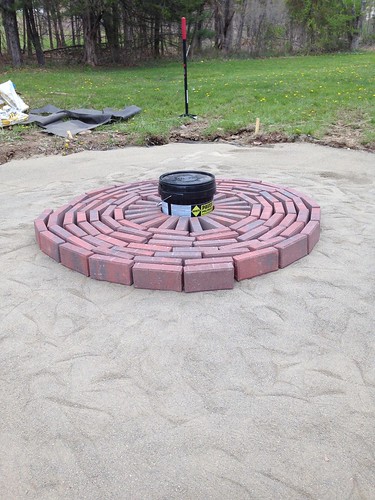
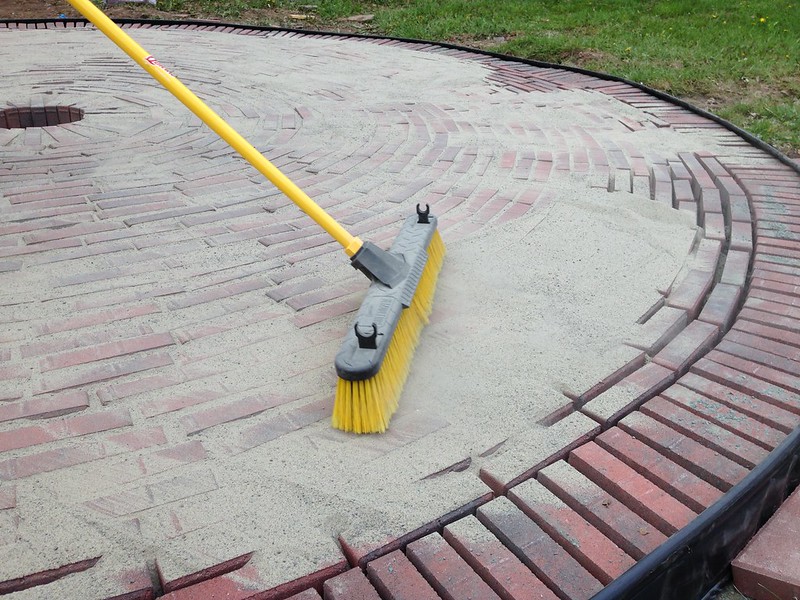
After the spot was excavated, there was a fair bit of jackhammering and rock moving required to get that round hole dug deep enough to start laying the base for the firepit patio. Once the prep was done, the rest went a bit easier and you could really see the outdoor area take shape. (I can take no credit for any of that backbreaking work as I was very much pregnant and fully okay with using that an excuse to just shout design suggestions from the sidelines.)  We used a layer of landscaping fabric to prevent weeds followed by pea gravel, sand, the stones and then polymetric jointing sand to hold the whole thing together.

Man jackhammering ground for firepit patioStacked bricks on sand for firepit patio pattern Spreading sand in cracks on firepit patio bricks
Thanks to some super wet weather, we had to let that dry for several days before it felt stable enough to proceed but it did harden eventually.  Finally it was time for the firepit - the center of the action at any outdoor gathering with us!  My brother and sister in law smartly used some of the rock broken up from the excavation to lay a windy stone path from the house to the patio. Waste not, want not!

Circular DIY Brick Patio www.brooklynlimestone.comPhoto May 30

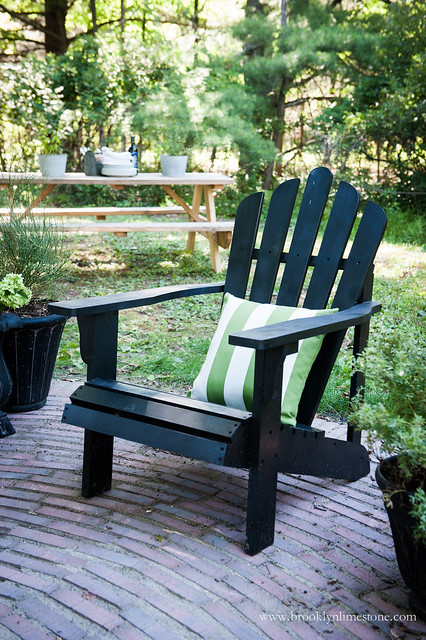
Once the hard work was behind us, the fun part of outfitting the firepit patio with just the right pieces to make the most of this backyard space was ready to start.   In went Adirondack chairs - painted black to give it a more updated look.

Backyard_BrooklynLimestone (5 of 27)160723
After deciding we wanted to be able to move the lighting for different types of events, these allen + roth string lights were strung from cedar poles anchored into cement bases.

  Circular DIY Brick Patio www.brooklynlimestone.com

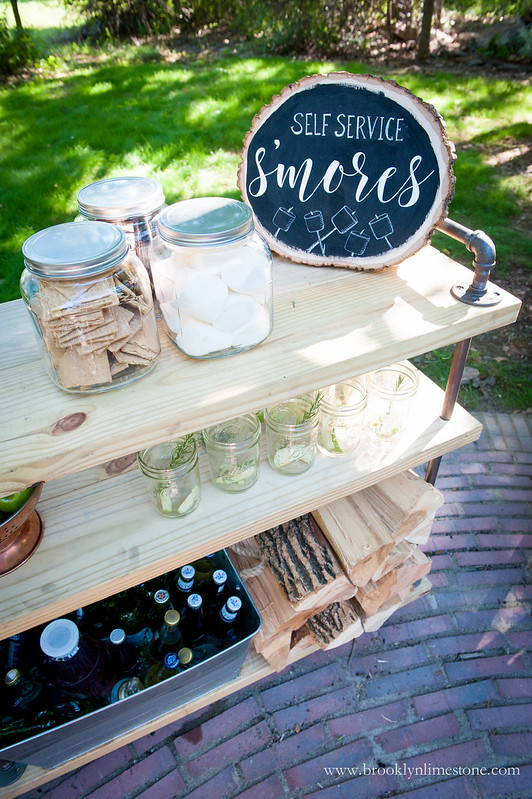
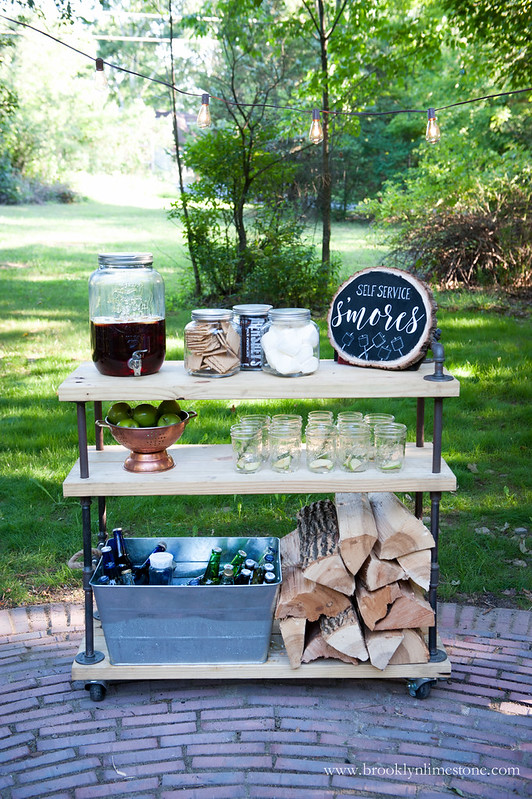
Lumber and pipes were used to make this s'mores fixings cart which I'm kind of obsessed with.  Once again, on wheels to make the most of it's function as BBQ cart, firewood caddy or outdoor bar cart as needed.

Close up of s'mores cart on firepit patioS'mores cart with wood slice sign, drink container, glasses, and s'mores supplies

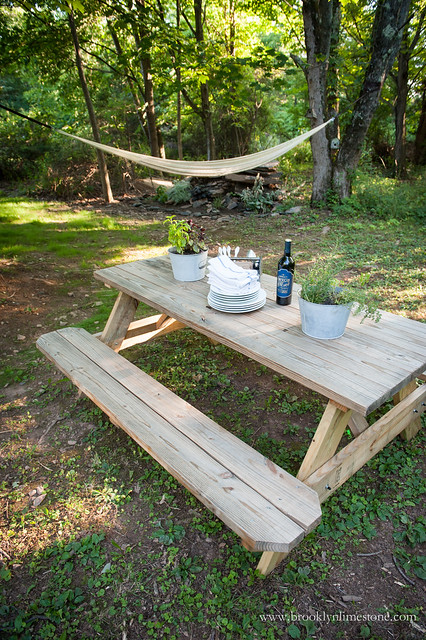
Finally off to the side we created another zone with a picnic table and a hammock for extra mingling and relaxing spots.

Closeup of firepit patio Picnic table next to firepit patioBlack Adirondack chair on firepit patio

I just love this space so much! Maybe it's city life but the raging fire is the ultimate entertainment for all ages. I wish it were in my own backyard but I'll just have to plan to stop over a little more often.

Firepit Patio Resources

Red Charcoal Holland Concrete Patio Stone
Paver Base Sand
Polymeric Jointing Sand
Landscape Fabric 
Flagstone Firepit Project Kit
Adirondack Chairs
Picnic Table
Striped Pillows
5 gallon buckets
Quickcrete 
Bulb String Lights

Love DIY? Check out all of my DIY projects!

Country Cottage: Simple Rustic Dining Room

You've already seen the country cottage living room makeover (which definitely qualifies as one of my favorite rooms evah!) so it's time to see the other side of this room which is the dining space. With budget a serious constraint, the decision was the keep this room simple and more cabin like. That way it served as a counterpoint to the living room as well as a calm, open entryway to the whole house.


Renovation was essentially a clean up job. Pulling up carpet, sanding and staining the rustic existing floor boards and the whole space getting a fresh coat of white paint. The dining table and chairs are hand me downs from my sister in law's parents so absolutely free. The indoor herb garden was put together with a few scraps and some hardware and make a great live addition to the room.  The one splurge was this antler chandelier which gives the whole space a fun element while still being clean and modern.


When budget allows, I think these copper chairs along with some drapery and a sisal rug will finish off this room beautifully. I'm trying to convince them a shiplap wall would be pretty rad too but it's a bit of splurge and I think they are all DIY'd out lately.  But plenty of time to work on that in future years - until then, this is a lovely spot to entertain (and my sister in law is an amaaaazing cook and baker so I always look forward to meals here)


Rustic Living Room Makeover with a Modern Twist

So time for the big reveal of the Rustic Living Room makeover at the country cottage. I'm so pleased with how it turned out and excited to share it! This room started out with pretty meager beginnings but it's now transformed into something comfortable, inviting and personal. Disclosure: World Market was kind enough to provide the items featured in this makeover post but all opinions expressed are my own. A huge thank you to them for their help in making this makeover complete! A little look back to the before and the during... And now... A little backstory: My brother and sister in law have been slaving away up here doing all the not so glamorous parts of renovating a fixer upper but they had very little budget for the fun stuff - furniture, decor, etc.  They were literally spending weekends sitting on the floor after all their hard work!  So I reached out to my friends at World Market and I was so overjoyed when they agreed to lend a helping hand. With their help, I was able to surprise my brother and sister in law with a great makeover. Their collections of updated and eclectic decor were perfect for this space!

Let's break it down and See how to do a Rustic Living Room Makeover.

As you can guess, the room needed a little prep work before the decor could get started.  After some electrical and sheetrock repairs, the floors were sanded and the whole room got a coat of soft white paint (Glidden's Marshmallow White in flat finish).
The room design started with a pair of Blue Velvet Kendall Sofas from World Market. I loved their slightly unexpected color without sacrificing a neutral palette.  And their low scale was perfect for this cozy room with low ceilings.  I paired those with the Aiden Coffee Table and Bar Cart.  The Blue and Gold Tufted Wool Rug pulled together the conversation area. Finally, the Distressed Wood Harrow Dining Bench is used for another surface area as well as to better separate the living space. A rustic living room can't live on furniture alone so we needed to add some personal touches.  First the oversized artwork as a whimsical nod to the hipster outdoorsy vibe their town projects.  We took wood planks and framed them out with 1x2 trim before staining and painting. The bar cart got outfitted with some favorite libations as well as this wood framed chalkboard.  Today it reads: Conserve Water, Drink Champagne.  For a little accent lighting, a fun Edison Glass Cloche lamp fit perfectly. The stair risers were painted an inky charcoal shade and then had a numbered treatment added on for visual interest.  I think this was the most controversial design element - I personally loved it and so did my sister in law.  My brother scratched his head at this one but did admit it looked cool after it was all done. A wall of vintage handsaws (sourced on eBay) were hung gallery style as another rustic touch. For even more personal touches, the vintage wooden crates tucked under the bench and the telescope were used at their wedding.  A succlent garden planted inside my sister in law's great grandmothers bundt pan made a great coffee table accent. To finish it off, a few lilac branches clipped right from their front yard graced this beautiful recycled glass vase. What a joy to put together and my brother and his wife are excited to have a finished space to enjoy all their hard work!

For More Living Room ideas Check Out

Shore Living Room Makeover Family Room Makeover

Sneak Peek: Living Room Makeover

Well that was fun!  Spent a weekend running around to finish off the country cottage living room makeover.  
Remember that terrible show Trading Spaces?  Well this weekend was sort of like that - my brother and his wife being the homeowners, I played the eccentric designer pushing them along and the room gets transformed in a matter of days.  Luckily for them, I had no plans of gluing feathers to the walls - I just love how it turned out.  Can't wait to show you the rest!

Full before and after reveal in the next post!

sources: Bar Cart / Edison Lamp / Chalkboard / Wall Color Glidden Marshmallow White

Country Cottage Renovation

While my gut renovation days are behind me (at least for the foreseeable future), I'm very excited for my brother and his wife to embark on their own adventure. They recently purchased this little cottage in upstate in NY and are about to go headlong into the world of DIY.


It needs quite a bit of work but I'm excited to see how they transform this little house into a home. My brother is quite handy (you may remember him from such posts as wooded wedding invitations, the best wedding of all time, the idiots guide to changing a light fixture, and DIY photo shelves)


There is a lot of work to be done and they are on a very tight budget but I have complete faith they will make something beautiful here.  Maybe they will even let me lend a hand here or there.  More to come on this country cottage renovation.


Follow @ Instagram

© 2007-2020 Brooklyn Limestone. All Rights Reserved. Privacy Policy
Back to Top