Showing posts with label diy. Show all posts

Rainbow Stripe Desk Makeover

If you are following me on Insta, you might remember this little french provincial style desk we picked up for $20 bucks at a flea market. Aggie actually chose it so it was an easy sale. I shared a photo of her standing next to it proudly and soooo many people messaged me to say they had this same desk growing up in their bedroom. Not surprising since it was a big seller for years from Sears. It originally sold for $79!

Obviously I couldn't leave it as it was.


A couple of coats of chalk paint, a little refresh of the hardware and some rainbow stripes  for the top.  This was exactly the kind of makeover this piece needed to give it a updated look but didn't require much effort.  Aggie loves her new desk and it adds some great storage for all that paper that 6 year olds seem to create in their wake.


Girl Astronaut Nursery Makeover

Last month we celebrated a very joyous occasion - the arrival of a niece! Since our family is rather small, this was truly an exciting event and we were so happy to welcome her into the world. Of course no baby's arrival is complete without a tiny space to call her own. My brother and sister in law went with an astronaut theme for her nursery which I just adore.
Girl Astronaut Nursery

I helped a little with the constellation mural and a few suggestions but they did all of the hard work. I love the "after" but especially after knowing what the "before" looked like.


Pretty impressive, right?

Space Theme Nursery for GirlBook Display and Storage in Nursery
The space is small but functional, creating display and storage as well as clean open space.  Perfect for lulling baby to sleep. When she is a little older, there will be space to play as well.

I helped with the constellation mural.  We tried a few different wants of painting it on but ended up figuring out that a silver sharpie (or actually 5 or 6 of them) was the best and easiest approach.  For just a few bucks, it made a great impact on the big blank wall.
Constellation Mural DIYArt for a Astronaut Theme for Baby Girl Nursery

Room Sources:


Easy Holiday Decor DIYs from Christmas Past

One of my favorite parts of Christmas decorating is unpacking some of little decor DIY's I've created over the years.  They are buried in the older pages of the blog but I love to reuse them year after year. Here are my top 9 that anyone can make with just the most basic tools and materials.


What is your favorite item to uncover in your holiday decor boxes?

DIY Tiki Bar

Build a basic tiki bar for your next backyard luau with these easy to follow instructions.


Somehow Oscar is turning one next week and we wanted to make sure to mark the occasion in a way that would fun for the adults and the kids. A backyard luau is something we have never done before so we went with it.  In addition to the grass skirts and flower leis, I wanted to build a basic tiki bar to add to the charm. I made this one small enough for our back deck but you could adjust to any size.


I wanted to make something quick (I made this during baby naps over 1 24 hour period), easy (no special tools required) and reasonably cheap.   This was my solution and I think it looks appropriately Gilligan's Island. I also plan on reusing it for this year's Halloween display so doubly useful for me.  If you wanted to create something that would withstand the elements for longer and/or looked less rustic, you could use cedar which withstands moisture and rot but I just used the cheapest lumber I could find.

Materials used: 13 1x4 cut into 35 inch lengths, 2 1x2 cut into 29 inch lengths, 6 1x2s cut into 13 inch lengths, 1 16x36 inch wood piece for the top, 2 29.5x13 wood pieces for the shelves, wood screws, stain or paint

Build the Tiki Bar

  • Line up 9 of the 35 inch pieces edge to edge. Screw together using 1x2s.  Place those pieces where you want your shelves to sit. I have them at 13 and 21 inches from the bottom. This will make the front of the tiki bar.
  • Line up 4 of the 35 inch pieces edge to edge, screw together using 1x2.  Repeat.  This will make the left and right side of the tiki bar.
  • Screw the left and right sides to the face by abutting the short edge to the back of the long edge.
  • Screw in the 1x2s to the underside of the top.  Screw in at right and left for extra hold.
  • Place the shelves on the 1x2s support
  • Stain or paint as desired. I used a mix of brown paint and MinWax Coastal Grey stain.
  • Optional: use scrap wood to create Tiki Bar sign hanging from the counter

The only tools you need are something to cut the wood with (or get your local hardware store to do it for you) and a drill.  It came together pretty easily and has a lot of rustic charm perfect for a luau display.


Hand Painted Floor - Hide Your Ugly Vinyl Floor

A dramatic hallway makeover is completed on a small budget including an original hand painted floor, some modern accents, and white walls.

Shot of hallway with hand painted floor
As you might expect, I love talking decor with friends so when my bestie shared she was working on her hallway, I was eager to see what she had in mind.  She was on a strict budget so she was going to do what she could with the space without spending a fortune.  That included keeping the vinyl flooring that was ahem, less than ideal.  A few weeks later I stopped by and was stopped dead in my tracks with the impressive makeover she completed. I so wish I had a before photo to share but you'll just have to take my word for it that this hardly feels like the same home. Yes, that floor is hand painted.  I don't know how many hours it took but I think "a lot" would probably not cover it.  She did not use a stencil but rather marked out the pattern with car detailing tape.  Hard to believe this is all just old vinyl.

Hand painted floor close up Hand painted floor from outside front doorHand painted floor facing front door from inside

I'm just in love with this space and wanted to share it with you too!  I call it moody in the best way possible. This space tells me something about the owner while still being practical.  While it's small in size, the flooring and the art draws the eye in giving it a feel of more space.  Hooks and a bench make it functional.  The "hello" and "goodbye" give it whimsy and finally, the floor gives so much style.

Horizontal pic of hand painted door from outside

A Hand Painted Floor Makes Any Space Pop

Vertical photo of hand painted floor from outside front doorClose up of hand painted door from outside front doorClose up of front door hardwareVertical shot of open front door and hallway wall

Hand Painted Floor Sources:

Sherwin Williams Anchors Aweigh
Gold Paint
Brass Chandelier
Brass Pendant 
Mid Century Style Wood Bench
Brass Pilltop Hooks
Wood Panels
Door Decals

What design would you use for a hand painted floor in your home?

For more hand painted projects check out:

DIY Coffee Hand Painted Sign

Painted Scrollwork Dresser

3 Easy Tricks to Up your Curb Appeal Game

Disclosure: This is a sponsored conversation written by me on behalf of Schlage. The opinions and text are all mine. 

**Click here to enter to win $1000 gift card + design consultation with Carmen Phillips**


While curb appeal gets a lot of attention when you are selling a house, it can sometimes be neglected when you are actually living there. It's easy to get overlooked since you spend most of your time INSIDE and other jobs can take priority. But, there are easy ways to improve a home's curb appeal without a ton of effort (so you can get back to your big to-do list elsewhere) and reap the rewards you can enjoy every time your return home.


There are plenty of traditional, time tested ways to improve your curb appeal from great landscaping to beautiful woodworking to upgraded lighting. You probably have already heard them all so I won't bore you with the basics. Instead, I'm sharing a few easy tricks that you might not have thought of before.  Added bonus is that they that take very little time or money to implement but still reap big rewards.


Trick #1 | Opt for dark colors Instead of getting a new front door, paint your existing one with a rich shade to create a modern eye catching entry. While investing in a fabulous front door is generally a great idea, paint can do wonders at a fraction of the price. Skipping the bright colors and sticking with a dark shade will help hide a multitude of sins while making even an outdated style appear modern and fresh. Black is a perpetual favorite, but you can create the same impact with rich inky blues, forest greens and charcoal greys. Don't be afraid to go dark here as a deep front door will attract the eye -particularly if your home is painted a lighter shade. The same concept is employed by a winding stone path, spot lighting and great molding but this idea is a much easier solution with the exact same result!


Trick #2 | Update your door hardware Even the most outdated door gets an instant pick me up with a new front handle set. Especially if you pick something with great clean lines like SCHLAGE'S CENTURY FRONT ENTRY HANDLESET. Not only is this an easy upgrade to install that beautifies your entryway - it also improves the security of your space in a flash. You can go two ways with finish. Opt for the matte black finish on a dark door (as in this example) to give a more modern, monochromatic feel to the entry space Or go with a matte brass or nickel to create some visual contrast and eye catching reflective surface. Either way, the new handleset will create the impression of a more updated home in a flash.


Trick #3 | Add Whimsy Whether it be a fun vinyl decal welcoming your guests, a modern wreath or a pink flamingo, adding something just a little bit fun will not only show your personality but also gives the eye something to rest on. On the example above, the white "hello" decal is a super affordable and fun addition that can be installed in one minute flat. This technique will distract from the elements of your entry that are less than ideal. Take a step back and look at your front entry way. Does it have depth and texture already with the existing structure, materials and plantings? If not, add in a few layers like big leafy green ferns or hanging plants, updated house numbers or an eye catching welcome mat. If your front entry space is located on a porch, add a cozy seating area for extra welcome. The goal is to be inviting to both guests and residents so go the extra mile to create that message visually

Disclosure: This is a sponsored conversation written by me on behalf of Schlage. The opinions and text are all mine.


Update the decor of any room in 10 minutes!

There are lots of ways to update the decor of a room - fresh paint, new furniture, better lighting. But there are few better or faster ways to make a quick change in almost no time at all than to update the door hardware. It's a small and easy change but the impact is big.

If you know me, I'm a hardware junkie. I fell in love with the limestone partially because of the door hardware. Even though the rest of the house was a complete disaster, the hardware was the window into the past that lured me in and inspired me to take on the challenge. I love to visit architectural salvage shops and pour through their vintage hardware for great finds. There is something oddly sentimental about a good doorknob to me. I imagine all the hands it touched over the years - like a small bit of history saved. Even when used in less than traditional ways, I'm a sucker for a good doorknob.

schlage matte black doorknob

Practically speaking, the right door hardware has outsized visual impact. Think of a great doorknob as the great pair of earrings to pair with a classic dress. Small in size but can instantly update a space. Best of all? Replacing an old doorknob with a new one could not be easier! It requires no special tools or skills - simply unscrew the one you have, pop in the new one and screw together. Voila!

schlage matte black doorknobschlage matte black door knob

I had been wanting to change out the door hardware in our shore apartment for ages but it never made it high enough on the to-do list. A few years back we renovated the BATHROOM but left the door hardware for a future project. Then hurricane Sandy hit and we renovated the KITCHEN, but again, we never got around to tackling that door hardware. There has always been a mishmash of colors and styles that drove me a little crazy. It's a small thing but the wrong door hardware always screams "thrown together" to me in a way that is never a good thing.


So when Schlage contacted me to see if I was interested in partnering with them, I jumped at the chance. Having used Schlage locks for years already, I knew I was getting a quality product that would last and would feel sturdy to the touch.

schlage matte black doorknobs

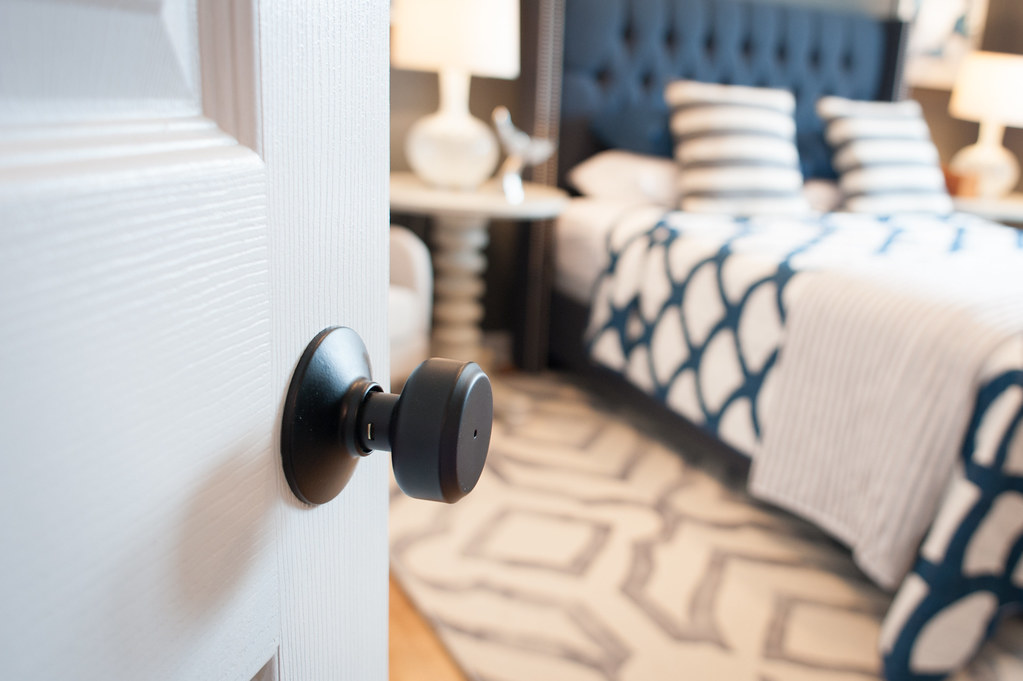
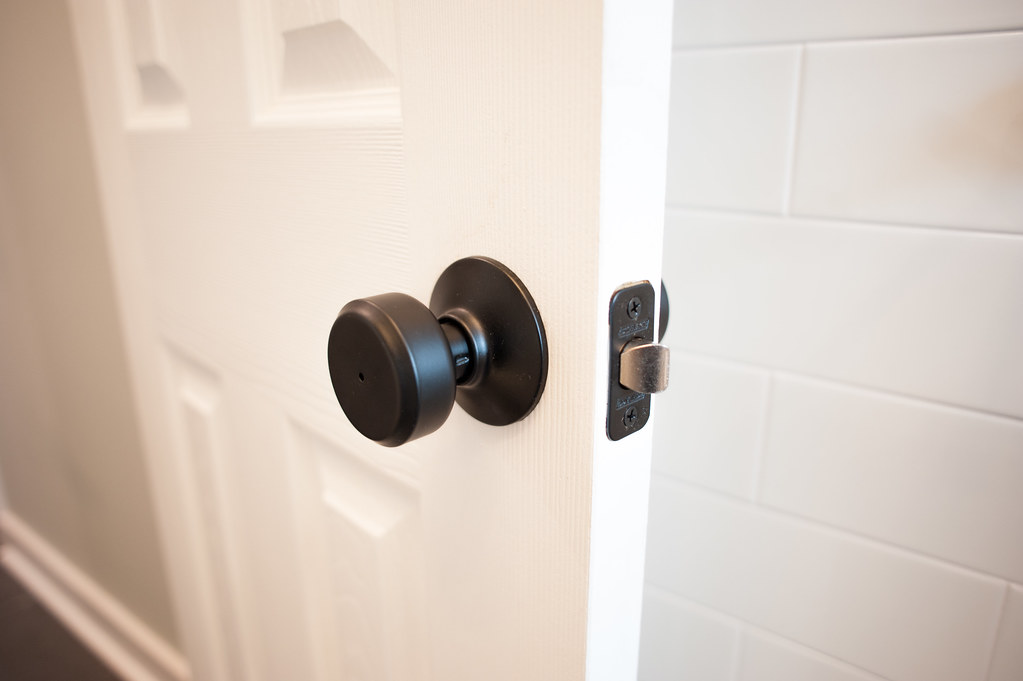
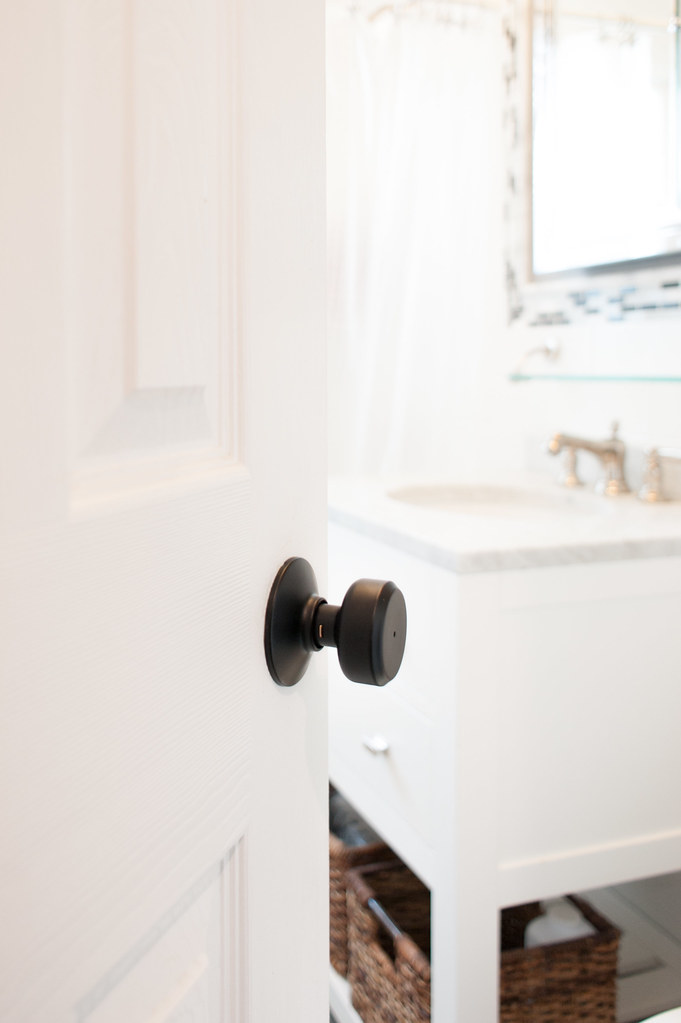
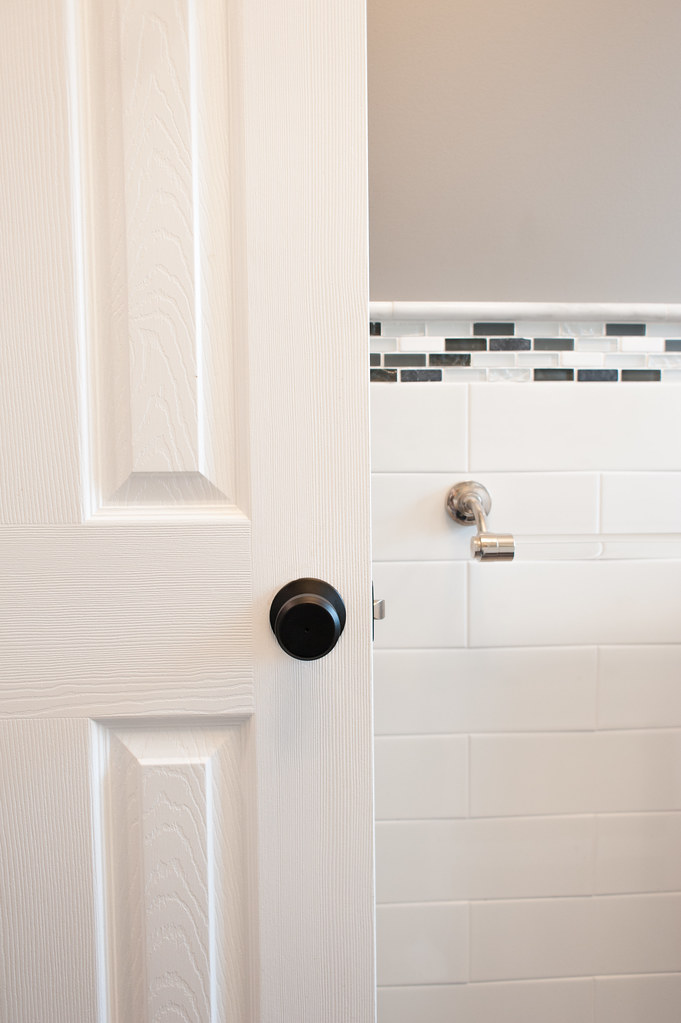
Since I like to mix metals as my tastes change, I wanted the knobs to be versatile to work with any finish. I selected SCHLAGE'S BOWERY KNOB WITH GREYSON TRIM in matte black for the closet, bathroom and bedroom doors. Bravo to Schlage for making a great matte black finish that goes with just about any style. It works as well in a coastal style home like ours as it would in a modern or industrial space.

With so little time invested, I finally have matching hardware unifying the apartment and updating the style at the same time. What a difference an hour can make when you have the right materials. I could not be happier with the result!

Disclosure: This post was sponsored by Schlage but all opinions expressed are my own.


DIY NETFLIX + CHILL BATH CADDY

DIY the bath caddy of your dreams using a piece of scrapwood using this easy tutorial. 


I know all you hopeless romantics out there are looking for the perfect handmade Valentine for your schmoopy.  Well move along!  This DIY homemade gift (which is perfectly acceptable to make for yourself!) is for all the lovebirds who just want a few minutes alone in the bathtub with their favorite tv show and beverage.  Is there a bah humbug for Valentine's Day?  This bath caddy is the embodiment of it.  This is 'Netflix & Chill' for grown-ups. Can I get an "Amen"?

This project is super simple and if you happen to have a router (or can borrow one for a few minutes) you are set.  Simply cut a board to the width of your tub, mark out the appropriate size divots for your smart device, votive candles and wine glass of choice.  The first step was to use a corner round bit to finish up the rough edge of the board. I used a straight bit to cut out the slot for the iphone, votives and wine glass. Voila!  I think it would look even better stained but I was too impatient so I took the easy route and got the bubbles going.


Happy Valentines Day lovers and loners alike!


Holly Jolly Dining Room aka Elf Toy Workshop


It's almost Christmas so time to get our house ready for the fun later this week.  This year I designed a elf workshop logo I used for my christmas mail that I loved so much I wanted to incorporate it into the decor.  I pulled out an old window I purchased for $5 years ago and a red sharpie and got to work. I love how it turned out!


I added some fresh greenery in the form of a wreath, a stretch of garland and succulents.  Finally a spray of mini lights finished the look. I'm ready for Christmas dinner! Now if only the food would prep itself.

Sources:


Am I the only one who has yet to do ANY wrapping? Nothing like the last minute, right?


Instant Indoor Hanging Garden Hack

I'm all for an elaborate DIY that takes all  day but sometimes you just want the easy way out. Well here it is people.  An indoor garden that does the trick and can easily be completed in less time than it takes to make a cup of coffee.  For real!


My supermarket had these little herb plants on sale for $2 each and I happened to have both the pots and the tension rod hanging around so I put this up and I was done.  (If you want to make your own version, you will need a tension rod and these Ikea utensil holders.)  I just need to pick up one more pot to hang my rosemary and I'll feel like Ina Garten!

When these herbs die (which they surely will as I kill most plants), I'll head out to my slightly more elaborate DIY outdoor hanging planter  and bring in a few succulents.  For Christmas I might replace them with those tiny little evergreens that look adorable with tiny lights.  The options are endless!


Should you be in the mood for something more elaborate, I DIY'd this gift wrap organizer with lots of Ikea doodads a while back.


Firepit Patio - Country Cottage DIY Circular Outdoor Entertaining Space

This DIY firepit patio creates the perfect entertaining spot for evening guests. It's circular pattern gives it fun and whimsey.

Completed firepit patio with Adirondack chairs lights and plants

Disclosure: This project was done in partnership with Lowes but all opinions expressed are my own. 

Woo-hoo!  The country cottage's circular firepit patio is finally complete!  It was a bit of a battle as we had some obstacles in the form of bedrock at the patio site and an extra cold spring and rainy weekends but it got completed in July and I'm so happy to share it. Let's start at the beginning.

This is the before we installed the Firepit Patio:


  Before photo of firepit patio space

After the spot was excavated, there was a fair bit of jackhammering and rock moving required to get that round hole dug deep enough to start laying the base for the firepit patio. Once the prep was done, the rest went a bit easier and you could really see the outdoor area take shape. (I can take no credit for any of that backbreaking work as I was very much pregnant and fully okay with using that an excuse to just shout design suggestions from the sidelines.)  We used a layer of landscaping fabric to prevent weeds followed by pea gravel, sand, the stones and then polymetric jointing sand to hold the whole thing together.

Man jackhammering ground for firepit patioStacked bricks on sand for firepit patio pattern Spreading sand in cracks on firepit patio bricks
Thanks to some super wet weather, we had to let that dry for several days before it felt stable enough to proceed but it did harden eventually.  Finally it was time for the firepit - the center of the action at any outdoor gathering with us!  My brother and sister in law smartly used some of the rock broken up from the excavation to lay a windy stone path from the house to the patio. Waste not, want not!

Circular DIY Brick Patio www.brooklynlimestone.comPhoto May 30

Once the hard work was behind us, the fun part of outfitting the firepit patio with just the right pieces to make the most of this backyard space was ready to start.   In went Adirondack chairs - painted black to give it a more updated look.

Backyard_BrooklynLimestone (5 of 27)160723
After deciding we wanted to be able to move the lighting for different types of events, these allen + roth string lights were strung from cedar poles anchored into cement bases.

  Circular DIY Brick Patio www.brooklynlimestone.com

Lumber and pipes were used to make this s'mores fixings cart which I'm kind of obsessed with.  Once again, on wheels to make the most of it's function as BBQ cart, firewood caddy or outdoor bar cart as needed.

Close up of s'mores cart on firepit patioS'mores cart with wood slice sign, drink container, glasses, and s'mores supplies

Finally off to the side we created another zone with a picnic table and a hammock for extra mingling and relaxing spots.

Closeup of firepit patio Picnic table next to firepit patioBlack Adirondack chair on firepit patio

I just love this space so much! Maybe it's city life but the raging fire is the ultimate entertainment for all ages. I wish it were in my own backyard but I'll just have to plan to stop over a little more often.

Firepit Patio Resources

Red Charcoal Holland Concrete Patio Stone
Paver Base Sand
Polymeric Jointing Sand
Landscape Fabric 
Flagstone Firepit Project Kit
Adirondack Chairs
Picnic Table
Striped Pillows
5 gallon buckets
Quickcrete 
Bulb String Lights

Love DIY? Check out all of my DIY projects!

Follow @ Instagram

© 2007-2020 Brooklyn Limestone. All Rights Reserved. Privacy Policy
Back to Top