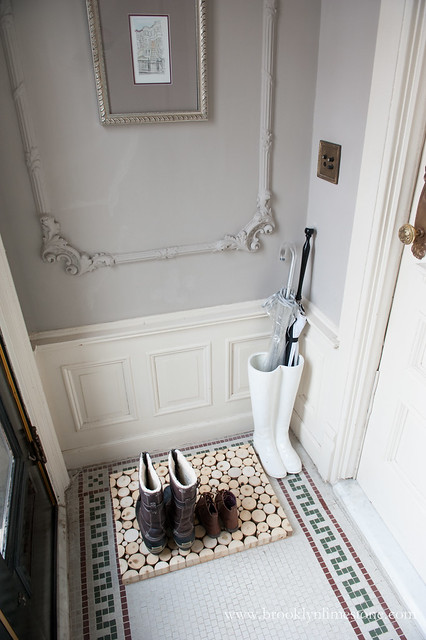
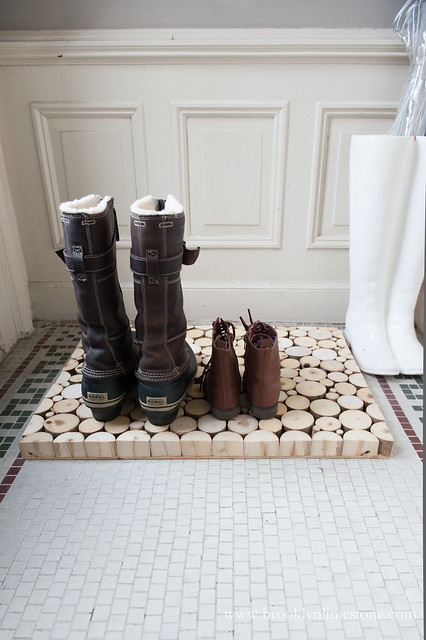
Showing posts with label hallway. Show all posts

Hand Painted Floor - Hide Your Ugly Vinyl Floor

A dramatic hallway makeover is completed on a small budget including an original hand painted floor, some modern accents, and white walls.

Shot of hallway with hand painted floor
As you might expect, I love talking decor with friends so when my bestie shared she was working on her hallway, I was eager to see what she had in mind.  She was on a strict budget so she was going to do what she could with the space without spending a fortune.  That included keeping the vinyl flooring that was ahem, less than ideal.  A few weeks later I stopped by and was stopped dead in my tracks with the impressive makeover she completed. I so wish I had a before photo to share but you'll just have to take my word for it that this hardly feels like the same home. Yes, that floor is hand painted.  I don't know how many hours it took but I think "a lot" would probably not cover it.  She did not use a stencil but rather marked out the pattern with car detailing tape.  Hard to believe this is all just old vinyl.

Hand painted floor close up Hand painted floor from outside front doorHand painted floor facing front door from inside

I'm just in love with this space and wanted to share it with you too!  I call it moody in the best way possible. This space tells me something about the owner while still being practical.  While it's small in size, the flooring and the art draws the eye in giving it a feel of more space.  Hooks and a bench make it functional.  The "hello" and "goodbye" give it whimsy and finally, the floor gives so much style.

Horizontal pic of hand painted door from outside

A Hand Painted Floor Makes Any Space Pop

Vertical photo of hand painted floor from outside front doorClose up of hand painted door from outside front doorClose up of front door hardwareVertical shot of open front door and hallway wall

Hand Painted Floor Sources:

Sherwin Williams Anchors Aweigh
Gold Paint
Brass Chandelier
Brass Pendant 
Mid Century Style Wood Bench
Brass Pilltop Hooks
Wood Panels
Door Decals

What design would you use for a hand painted floor in your home?

For more hand painted projects check out:

DIY Coffee Hand Painted Sign

Painted Scrollwork Dresser

DIY Rustic Wood Doormat or Boot Tray Made from Wood Slices

It's no secret -  I have a thing for wood slices. This wood doormat project has been rattling around in my head forever. Luckily, the whole project very simple if you have access to free branches or if you are lucky enough to have a generous friend who brings you a giant bag of wood slices just because I asked. Thank you to my wood slice fairies! Finished shot of Wood Doormat boot tray made from wood slices sitting on a table

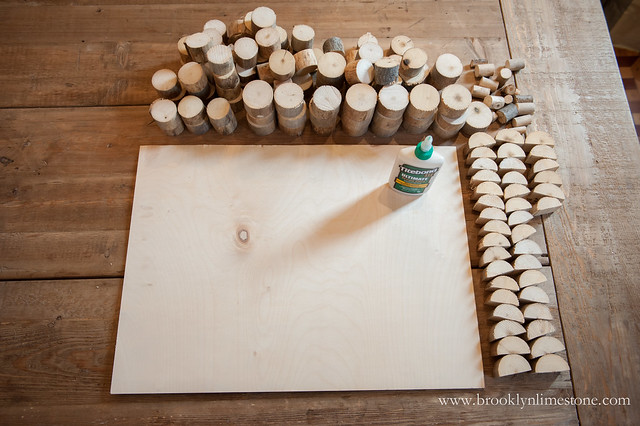
To make this Wood Doormat Boot Tray You will need:

  1. wood slices in a consistent height in varying widths (some cut in half for edging, some round)
  2. a base in the size you want your finished doormat to be
  3. wood glue.
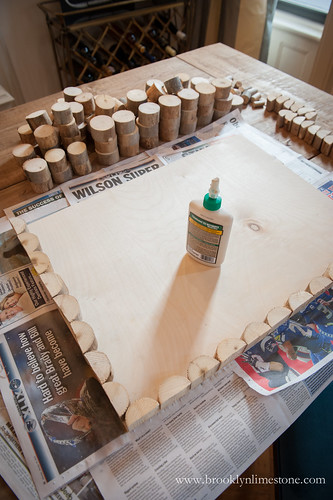
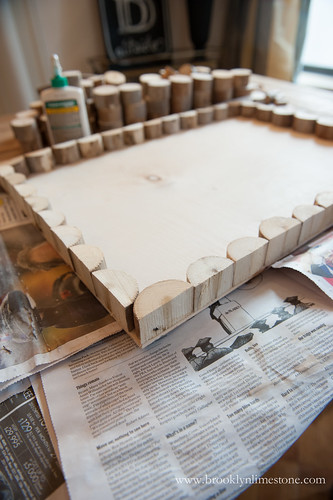
Supplies to make wood doormat  - at the top full circle slices, to the left 1/2 circle slices, a flat board and wood glue Wood Doormat with edge pieces placed on the left side and bottom with wood glue sitting in the middle of the board and wood slices for the middle sitting to the sideWood Doormat after all edge pieces have been glued down I started with a scrap piece of wood I had left from a prior project. There are probably more ideal base materials (feel free to chime in here) but I had this laying around so that's what I used.  My wood doormat is 24 inches wide by 18 high but you could make this in any size that works for your space.  Then it was all a matter of finishing the worlds easiest jigsaw puzzle. Wood Doormat finished and waiting for glue to dry after all the pieces have been placed
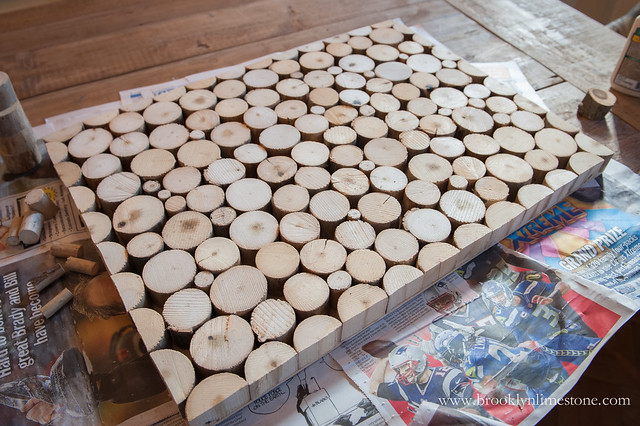
How to make a Wood Doormat or Boot Tray out of wood slices

  1. Start by dry fitting the half circles around the edges until you have a good arrangement.
  2. Then use the wood glue to tack each one down. Allow a few minutes to dry before moving onto the inside arrangement.
  3. Once the edge pieces are firm, lay all of the larger wood slices randomly inside the frame, followed by smaller pieces and kept going until you are happy with the way it looks.
  4. Then pick each piece up in place, add a dollop of wood glue and keep going until it is done.  ( Pretty sure you really need to glue them all down since they hold each other in place pretty well but I like to live dangerously.)
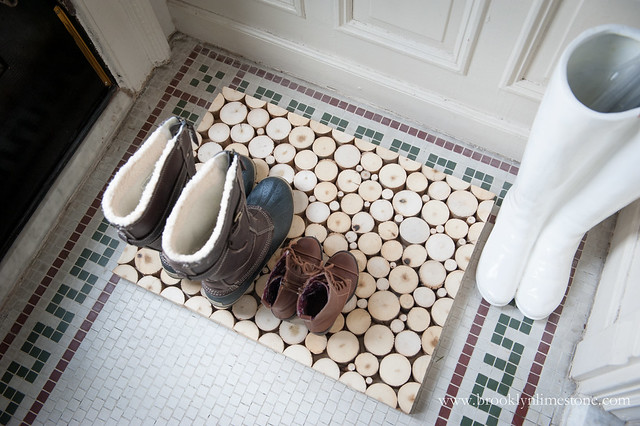
Close up overhead photo of wood slice DIY Doormat holding 2 pairs of boots with room for moreOverhead shot of Wood Doormat Boot Tray  in a tiled hallwayWood Doormat Boot Tray on tiled floor holding two pairs of boots So there you have it a wood doormat that is a place to dry my boots that was easy to create and a pleasure to look at! You might also want to check out this DIY Wood Doormat made from slats with a handpainted sign on it.

For More Great DIY Projects Follow me on Pinterest!

Hallway Mini Makeover

Welcome to the hardest working part of my house - the hallway. This is also the spot where I fell in love with this house - from the doorknob to the hall stand to the pocket doors, it has a lot of personality. But it also happens to get a lot of abuse as the only entrance and general dropping ground for just about everything. This is where we pull off our muddy boots, greet guests and get ready to go out everyday. After the terrible winter we have had (see how I've already declared winter is over? Wishful thinking!), I wanted to show it some love and give it a tiny makeover.

After a couple of minor changes, here she is...
HallwayMiniMakeoverAfter
It feels a lot cleaner and cozier now but most importantly it's A LOT more functional with a more powerful light fixture, a place to hide/store our shoes and a rug to add some color and protect the floors from the worst of the weather.

The existing light fixture was on my hit list for years because its single bulb was not providing anywhere near enough light. Once the sun went down, we could hardly see in here. So I knew I needed something with more bulbs but it wasn't until I spotted this classic 3 bulb Satellite fixture in unfinished brass that I was inspired to actually do something about it.  I love it!

Want to see the before? Click to see how it looked 2 weeks ago or 7 years ago.

For the curious, here are the details...
- Schoolhouse Electric Satellite 3 in natural brass with QuadLoop Edison bulbs
- Crate on wheels found at HomeGoods, painted by moi
- Momeni Summerton Rug also found at Homegoods for half price
- zgallerie Boots umbrella stand (that I sometimes use as a vase)

pssstt… Love the new fixture as much as I do? Stay tuned for a great giveaway from Schoolhouse Electric!

Follow @ Instagram

© 2007-2020 Brooklyn Limestone. All Rights Reserved. Privacy Policy
Back to Top