Showing posts with label artwork. Show all posts

5 Attainable Pieces of Original Artwork to Hang on Your Wall

If there was an ever a time to support small artists and creators, this is it.  I know so many of us are spending more time at home than ever so what better time to find some beautiful pieces to look at while we are spending so much time at home.  

Selecting art can be such a hard decision but I encourage you not to take it too seriously. Just find something you connect with and it will bring you joy.

Here are 5 (reasonably affordable) pieces of from artists I've been crushing on...

This dramatic skyscape by KatyLeigh is memorizing whether you see the clouds or not.

You know I'm a sucker for creepy portraits and this girl with bird by Nursel Fine Art checks all the boxes. 

This little crushed toothpaste painting by Kristine Kainer would be perfection in a bathroom.

If you need a piece for your kitchen, I'm loving the fried egg paintings Anna Shevel has done.  Pop art for those who like to cook!

And finally this pastoral painting by Sara Tubens is both calming but hard to look away from.

Any of these strike your fancy? Or do you have other artists you ar crusing on? Please share their work in the comments!


What should I put on my walls? | 5 Paintings You Can Buy Right Now

I often get asked for suggestions about what artwork a homeowner should buy. It's such a personal decision and I believe you should really love the artwork hanging in your home so it's hard to make recommendations without knowing a person's style. But I can suggest some great pieces of art by artists I admire and that's what this post is all about.  Each one of these is original and affordable so they are the perfect way to start dressing those endless empty walls.


Bliss by Jan Burnett is summer on canvas and would look great in so many little nooks.


City Abstract by Robert Frank reminds me of growing up in 1980s NYC (although I have no idea which city or timeframe he was painting)


 Jenny Doh's 654 Sights to See is just a little bit disturbing but also hard to look away. 


Old Fashioned by Lucas Simmons is a stunner in blue and green.


On the Way to School by Tali falls into the little bit odd category but there is something about the shadows and the expressionless faces that capture the eye.  You know I can't resist a good creepy painting.


Anything catch your eye?  Each one of these is an original one of a kind so if you love it, grab it. I'd love to see these beauties hanging in your home so please share!


If you like peeping artists like I do, check out an earlier post about 5 more wonderful artists to watch.

Note: This is not a sponsored post nor do I receive any benefit if you make a purchase.  I just want to support these artists in whatever (albeit small) way I can .

5 Artists to Watch + Paintings to Admire

I have commitment issues when it comes to art.  I love to shop and buy it but I tend not to be able to commit so I have lots of little finds hidden in closets and sitting on shelves.  It's a sickness.

Art can be such a hard decision for decorators but I want to encourage everyone not to take themselves too seriously.  Especially with some of the great work you can now find easily online.  Find something you love and hang it where you can see it.

With that in mind, here are 5 reasonable attainable pieces of art from artists I've been loving. If you have some artists to recommend (or if you are an artist yourself!), please share in the comments.


Salma Nasreldin creates such fun and eye catching work, it's hard not to be enchanted. This one is called 'Sunshine and Hurricane' and it's a particular favorite.


The gorgeous abstracts by Omar Obaid are mesmerizing.  And he makes them in huge scale which is oh so helpful in pulling a room together without having to find 25 different smaller pieces of art.  One of these is enough to carry a space.


Marleen Kleiberg creates characters I want to know more about. This melancholy (or is she just napping?) piece painted on a wood panel is my personal favorite.


Wouldn't this make a great conversation starter at  your next cocktail party?  Lisa Finch of French Canvas painted this little story on canvas and I can't look away.


Last but not least Camilo Matiz out of Luxembourg is painting dream abstracts in beautiful bright colors that are easy to fall in love with.


Any great artists caught your eye?  I'd love to hear and see more about them.


Non disclosure: This post is NOT sponsored. I just really admire the work and want to support them in any way (albeit small) I can.


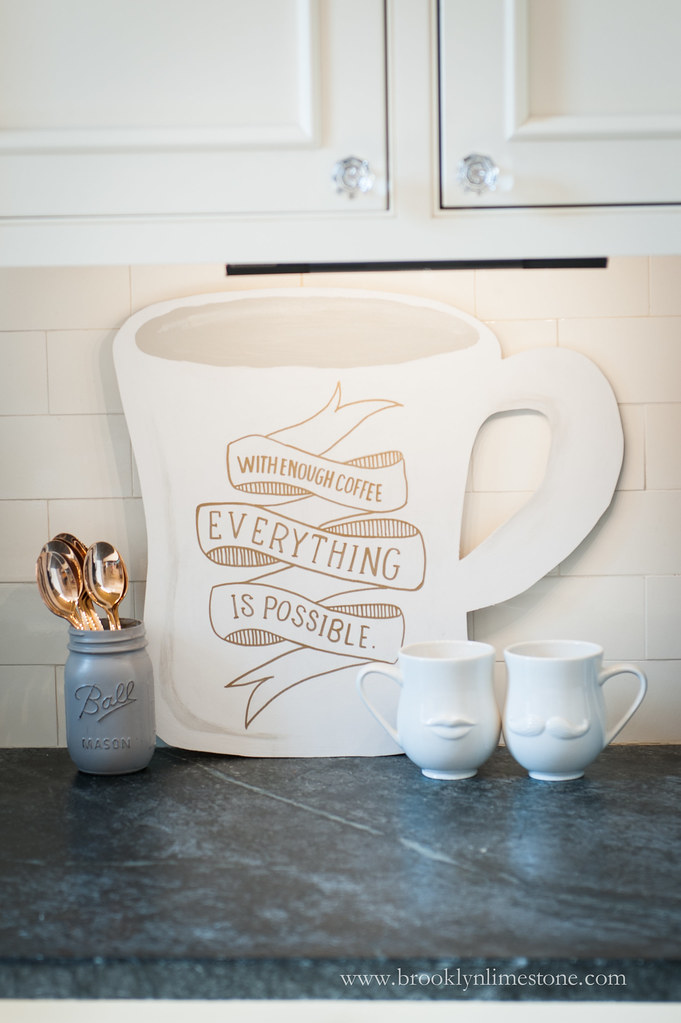
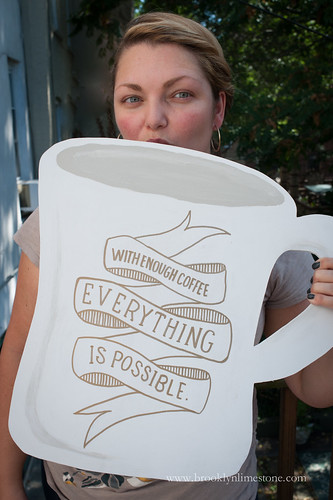
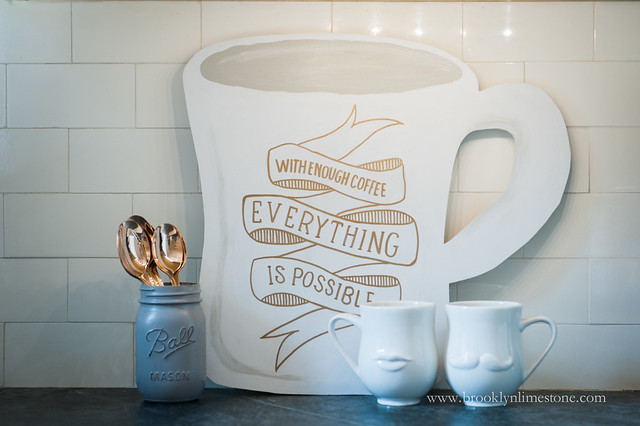
DIY Coffee Hand Painted Sign | With Enough Coffee Everything is Possible

I will admit that I sometimes need a little more caffeine than is probably recommended to get me through the day.  So okay, perhaps EVERYTHING isn't possible but starting my day with a little pep talk over a cup of joe seemed like a good idea.  Bonus: it hides the ugly outlet in my backsplash.
WithCoffeeEverythingIsPossibleDIYSign_brooklynlimestone.com (12 of 13)

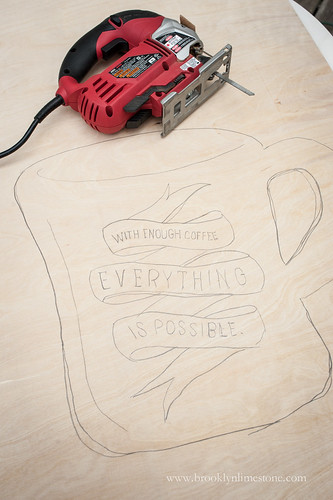
This was a super easy, fun project that I knocked out in a couple of hours with materials I had in the house. I started with a scrap piece of 1/4 inch plywood but you could certainly use something thicker.  I drew out my design with a pencil (and did a lot of erasing) until it looked suitably like a cup.  I wanted something that looked like it might have been found in a thrift shop so perfection was not the goal.  

WithCoffeeEverythingIsPossibleDIYSign_brooklynlimestone.com (2 of 13)WithCoffeeEverythingIsPossibleDIYSign_brooklynlimestone.com (6 of 13)
WithCoffeeEverythingIsPossibleDIYSign_brooklynlimestone.com (7 of 13)WithCoffeeEverythingIsPossibleDIYSign_brooklynlimestone.com (8 of 13)

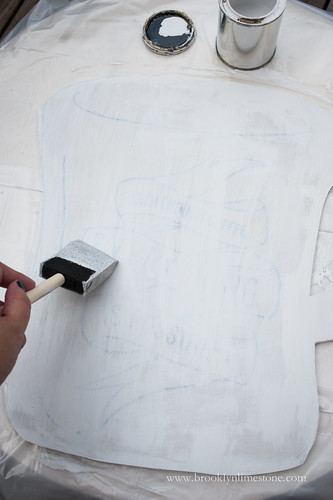
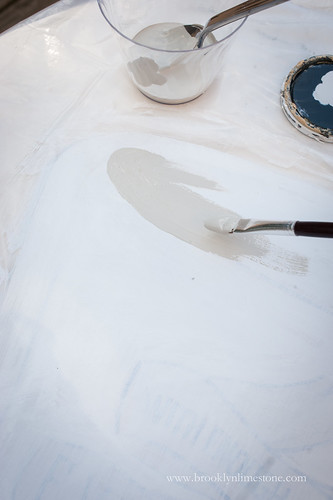
Using jigsaw, I cut out the cup shape and lightly sanded the edges.  I drew over the pencil marks with a marker knowing it would show through a light coat of the white paint.  After a quick white wash, I added some "coffee" and shading using a beige paint. Finally, I used a gold sharpie to retrace the faint marks to make the final markings on the cup.  Done!

WithCoffeeEverythingIsPossibleDIYSign_brooklynlimestone.com (9 of 13)

Refill please!


Photos for Sale. Get your Photos here.

You already know I have a love affair with a beautiful image but I've mostly keep that to myself.  A few years back, I sold some of my prints (the notion that an image I captured would grace a anyone's wall still thrills and honors me) but the admin was a bit of a bear.  So I've jumped on the bandwagon and switched over to Society6.


I've only added my very favorite images right now as a test.  I plan on adding more as time goes on but I wanted to let you know it was out there. You know, the whole bit about letting the universe in on your happiness..well here you go, universe.

I hope you'll take a peek around the shop. If you are in the shopping mood, you'll even get FREE SHIPPING when you click that link.

What do you think of the photos I've selected? Anything else I should add?


Coastal Kitchen Makeover - The Complete Before + After

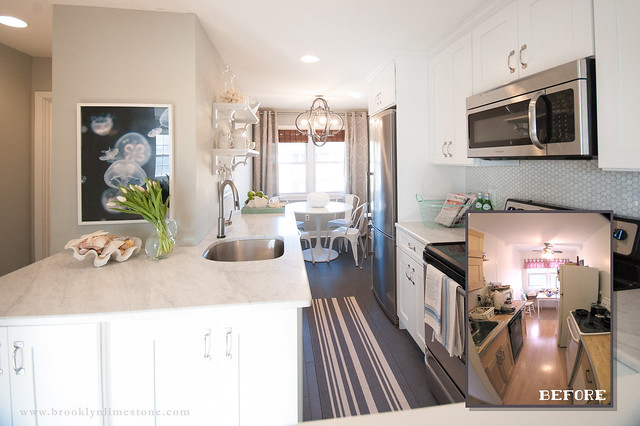
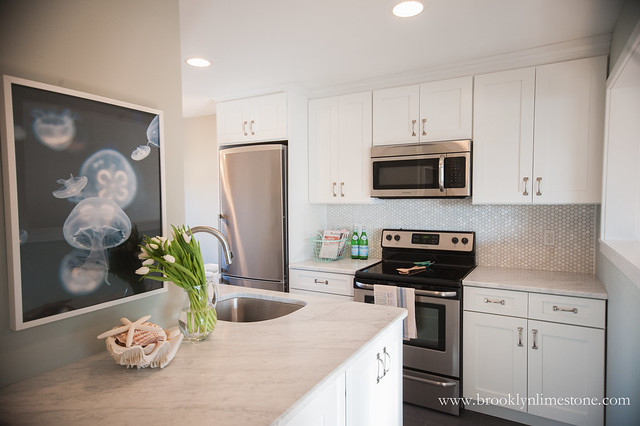
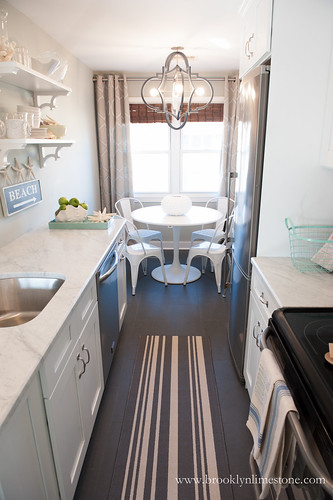
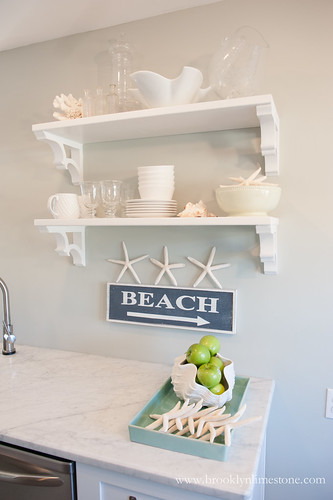
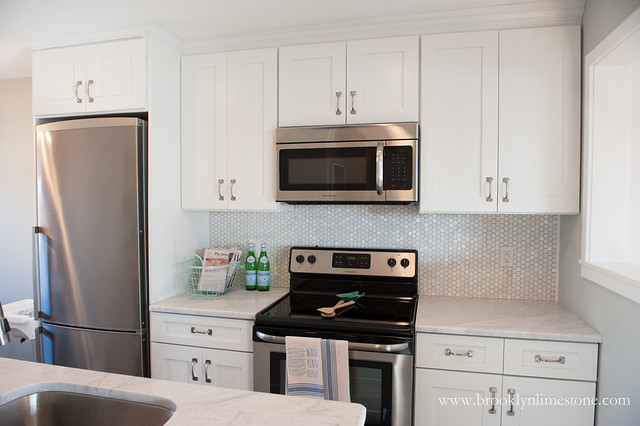
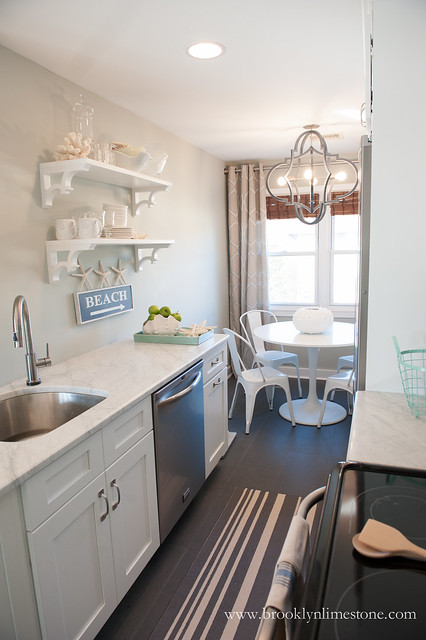
We are about to get a huge snowstorm here so what better time to start dreaming of the beach? Perfect timing to share the coastal kitchen before and afters! I know, I know - this is the slowest quick renovation in the history of time but I think it was worth it.  So much brighter, beachy (without being too over the top thematic) and functional. This coastal kitchen makeover made this kitchen much brighter, beachy (without being too over the top thematic) and functional. You have already seen most of the work in prior posts which you can access at the end of this post, but it was time to do a complete post with sources.
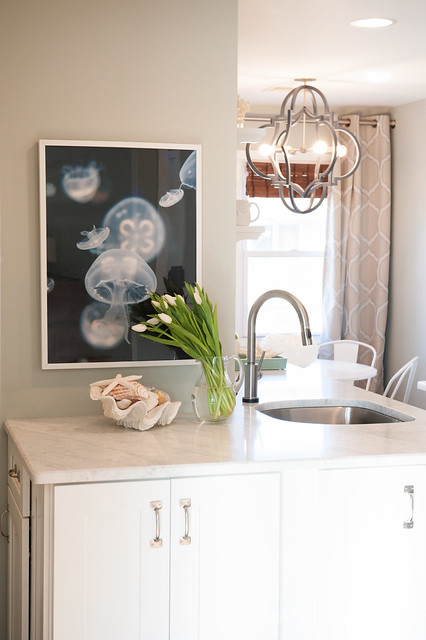
  This Coastal kitchen makeover made this kitchen much brighter, beachy (without being too over the top thematic) and functional. This coastal kitchen makeover made this kitchen much brighter, beachy (without being too over the top thematic) and functional. This coastal kitchen makeover made this kitchen much brighter, beachy (without being too over the top thematic) and functional. This coastal kitchen makeover made this kitchen much brighter, beachy (without being too over the top thematic) and functional. This coastal kitchen makeover made this kitchen much brighter, beachy (without being too over the top thematic) and functional. As you might remember, we wanted to keep the renovation tab down so we decided to keep all the plumbing exactly as is. The only real structural change to the room was tearing down half the closet and opening up the space on the left. Essentially we made a galley kitchen into a L-shape – giving us more counter space, a more open feel to the room and allowing the light from the kitchen window to spill into the rest of the apartment. After that it was just finishing work. We went with stock cabinetry and affordable tile flooring to offset the splurge of the marble countertop. The room is so much more open and clean looking now – I really love how it all turned out. This coastal kitchen makeover made this kitchen much brighter, beachy (without being too over the top thematic) and functional. This coastal kitchen makeover made this kitchen much brighter, beachy (without being too over the top thematic) and functional. This coastal kitchen makeover made this kitchen much brighter, beachy (without being too over the top thematic) and functional. It does need a few more accessories (perhaps a bigger shell or wood bowl under the jellyfish print?) and some artwork in the seating area (maybe a new whale chalkboard or some old window art?).  I haven't found just the right thing but I'll stumble upon something eventually. This coastal kitchen makeover made this kitchen much brighter, beachy (without being too over the top thematic) and functional. All the details are below (or at least as much as I could remember) but if I missed anything or you just have random question, do not hesitate to ask.

Coastal Kitchen Source List

Cabinetry: Ice White Shaker via Forevermark. We ordered through a local dealer but they are widely available and can be purchased online. Base cabinets and wall can even be purchased on Amazon. Flooring: Roca Orion Unpolished in 12x24 purchased at Classic Tile. We wanted slate look without the slate price. At $3/sq foot it was a steal.
Countertops: Carrara Marble
Cabinet hardware: Window Sash Lifts in Satin Nickel
Backsplash: Mother of Pearl Hex Tiles
Kitchen Faucet: Delta Faucet Trinsic Touch2O in Arctic Stainless
Open Shelving: Corbels and Wood Boards
Wall Color: Glidden Jade Frost
Table: Ikea Docksta
Light Fixture: Custom designed and built by Pickett Furniture (read about it here)
Chairs: Tolix Knockoffs Tolix knockoffs by Zuo Furniture purchased on sale at Joss & Main
Fridge: Summit Counter-depth Bottom Freezer
Drapes: JC Penney Turning Point in Lead
Runner: Target Striped Runner
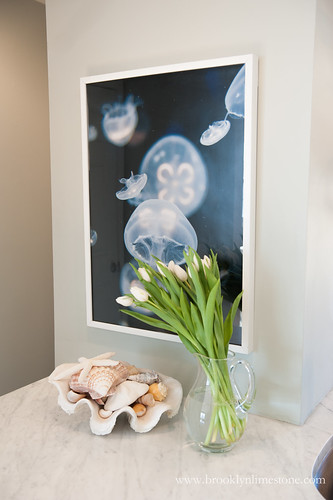
Artwork: Jellyfish photo print by moi

To see more of the Coastal Kitchen Makeover check out:

Coastal Kitchen Countertops
Coastal Kitchen Cabinets
Coastal Kitchen Paint Colors
Coastal Kitchen Flooring

Style & Skill Crush: Duy Huynh

I stumbled upon the amazing ethereal artwork of Duy Huynh and just had to share it.


Something about each of them just draws me in.

DIY Hidden Jewelry Organizer

A few weeks back I shared my master bedroom update that included this artwork hidden jewelry organizer I had built out of a few pieces of wood and hardware.  It's working really well for me so I thought it would be a perfect time to share how to build your own.
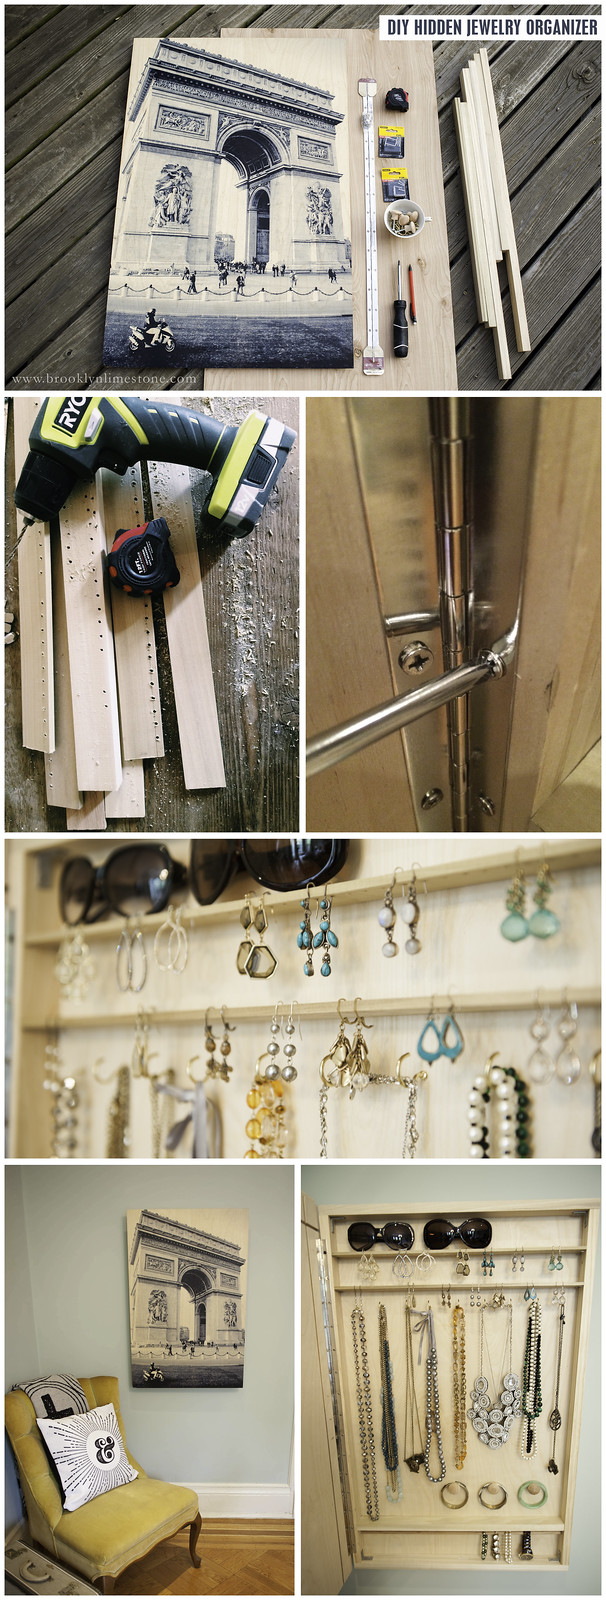
Hide your accessories behind your favorite photo with this easy to make DIY Hidden Jewelry Organizer

The measurements for your jewelry organizer will vary depending upon the type of artwork you choose to face it but its very versatile.  I would suggest pulling out the jewelry you would like to hold so you can size the shelving for what you are going to store.  The technique can be used to hide other things as well like a collection of ties, a television, a circuit box or a thermostat.

Materials needed to make a Hidden Jewelry Organizer: 


  • Artwork
  • Wood boards (as long and deep as you would like to make the box) 
  • A piece of plywood large enough to serve as the back of the box
  • Cup hooks
  • Wooden cabinet knobs
  • A piano hinge,
  • L brackets
  • Wooden dowel and screws.

How to make a Hidden Jewelry Organizer


1. Determine where on the back of the artwork you can attach your piano hinge. Using this as a guide, choose your measurements for the box that will be hidden by your artwork. If possible, make the box 1 inch smaller than your artwork to better hide it.
2. Cut 2 boards each for the width and length of the box. Screw the resulting 4 wooden boards together to form the frame of the box.  Use L brackets inside the corners for additional support (optional).
3. Cut and attach the plywood back with screws.
4. Measure the inside width of your box and cut wood boards to form shelves. Add as many or as few shelves as you would like depending upon your collection. To create shelves for earrings, drill pilot holes approximately a half an inch apart all along the boards.  If you have larger earrings, you can adjust this measurement as needed.
5. Using screws or shelf pins, attach the shelf inside the box as you would like.
6. Add cup hooks, cabinet handles and dowels as needed.


Hide your accessories behind your favorite photo with this easy to make DIY Hidden Jewelry Organizer

That's all there is to it.  The deeper the box, the more you can store!

I'll definitely be making another one for Aggie's big girl room to hold all her hair bows and other little doodads.  It's a great way to have those little items accessible without adding to the visual clutter.

For more Great DIY Organizational Ideas check out this DIY Mail Center!


Oh Baby: Nursery Artwork is Hung

It might seem like this is the worlds slowest room reveal but I'm not dragging it out on purpose. Im still missing the glider. I won't go into the details of what the hold up is now but its extremely aggravating and completely out of my control! Serenity now!

babybookartbrooklynlimestone

In happier news, the dresser is painted and I have some artwork up.  If you recall my original design, I had a slightly different plan but once the bassinet and dresser were in the room, it felt more spacious reversed so I made some changes.  I may still put up that picture frame molding on the other side of the room but I want to have everything place before I add anything else since I might prefer to use the blank wall for other, more temporary displays.

The artwork was a twist on this free download I shared a while back.  I took 4 favorite quotes from children's books and hung them in Ikea Odby frames.  I think it breaks up the navy blue wall nicely, works perfectly with the coral in the window treatments and adds a punch of pink without being too sweet.  What do you think?

I have a couple of finishing touches to add before I can't do another thing in here but wait.  At this point, I'm putting my money on baby arriving before the room is done.


Follow @ Instagram

© 2007-2020 Brooklyn Limestone. All Rights Reserved. Privacy Policy
Back to Top